How to Change and Customize Screen Saver on Mac
Introduction
While operating on different systems, you can use various tactics to improve the overall user experience. Many users assume that activating the screen saver is not helpful on your Mac device. In reality, there are benefits to keeping it as a fun element on the screen when the computer is idle. Also, it works as a security measure if you activate the password protocol here.
Using the default screen saver on your system or keeping a custom screensaver Mac is possible. In this context, there are specific steps that you have to carry out. Know the step-by-step sequence and follow through with the process.
What is a Mac Screen Saver?
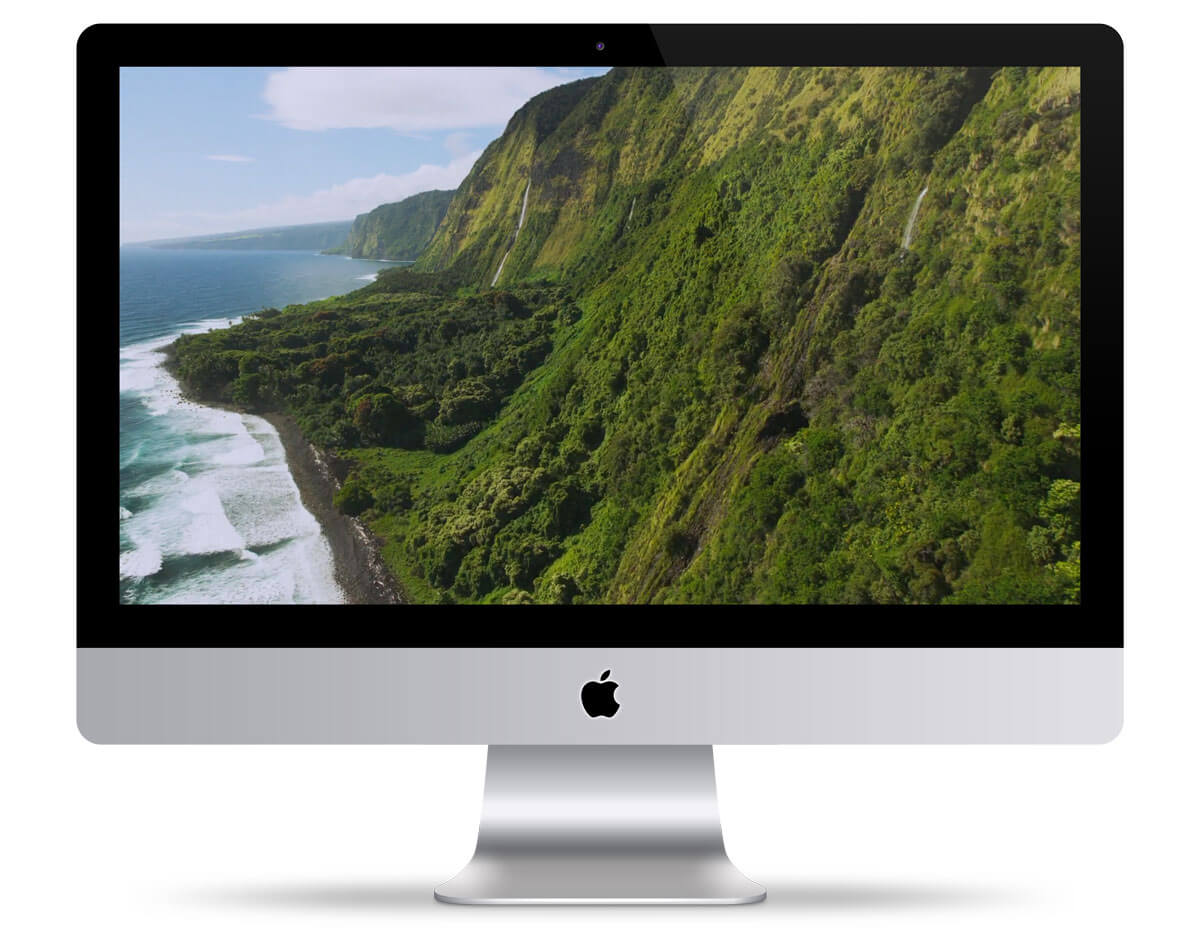
The screen saver on Mac computers are programs that create a blank display screen and includes moving patterns or images on a screen. It activates automatically on computers like Macbooks, etc., if you enable the function, and it occurs after a decided period of the idle screen.
The initial use of these programs was to safeguard the plasma/CRT-based computer screens from phosphor burn-in. Now, Mac users can use this program to keep the desktop closed off when they are away from the system for more privacy.
How to Change the Screen Saver on Mac?
The process users have to follow to change the screen saver on Mac is not complicated. There are also customization options available for keeping different patterns in the screen saver, changing images, adjusting time settings, and activating password protection. Here are the many methods you can handle on your device to customize this program to your liking.
Method 1: Go through System Settings on macOS Ventura Devices
In terms of how to change the screen saver function on Mac devices, it is essential to consider the version of macOS running on the computer first. For the latest Mac devices, the version is macOS Venture 13. The way to access and change screen savers here is through System Settings. Let’s proceed with the steps.
How to do this?
Step 1: On the Mac device, click on the Apple icon to open the menu.
Step 2: Next, tap on System Settings.
Step 3: Scroll down the left panel and choose Screen Saver.
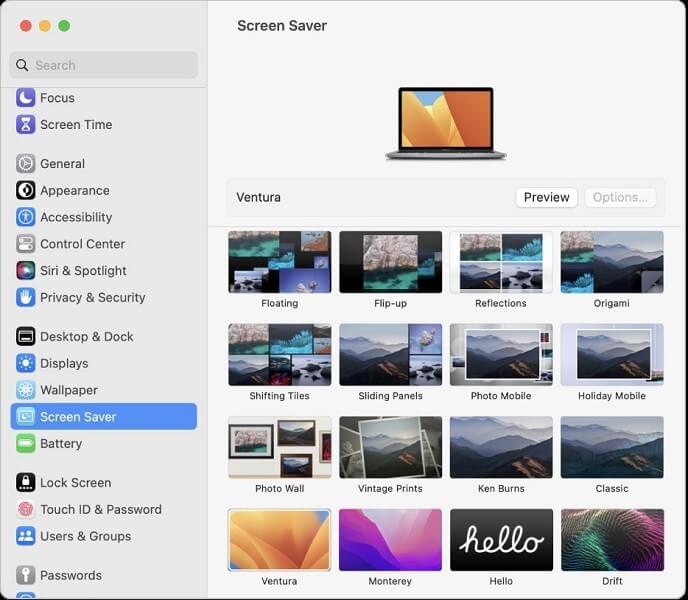
Step 4: Choose the thumbnail for the screen saver style you want to change to from the right section and press the Options icon above.
Step 5: Select your Options parameters next, like the speed, color, etc. In case you add a slideshow, choose “Shuffle slide order” for the device to adjust the pictures in random order.
Step 6: Under Source, tap the pop-up menu and choose the images present in this section or from a Photo Library folder on Mac.
Step 7: See the top thumbnail for a minimized look of the final screen saver look, or click the Preview button to see it full-screen.
Step 8: Hit OK at the end if all the changes suit your taste.
Method 2: Go through the Desktop & Screen Saver Program on Mac
For Mac devices before macOS 13, the Desktop & Screen Saver program is the section to enter. There, it is possible to make different changes to the custom screensaver Mac users choose. Typically, the device versions that this relates to are macOS 10.14 (Mojave), macOS 11 (Big Sur), macOS 10.15 (Catalina), and macOS 12 (Monterey).
The steps here for adjusting screen saver settings are relatively simple of different than the macOS 13 Ventura version users will use. Still, the interface design of this app is slightly different, so know the specific steps for that.
How to do this?
Step 1: On the Mac computer, click on System Preferences.
Step 2: From the options, choose Desktop & Screen Saver.
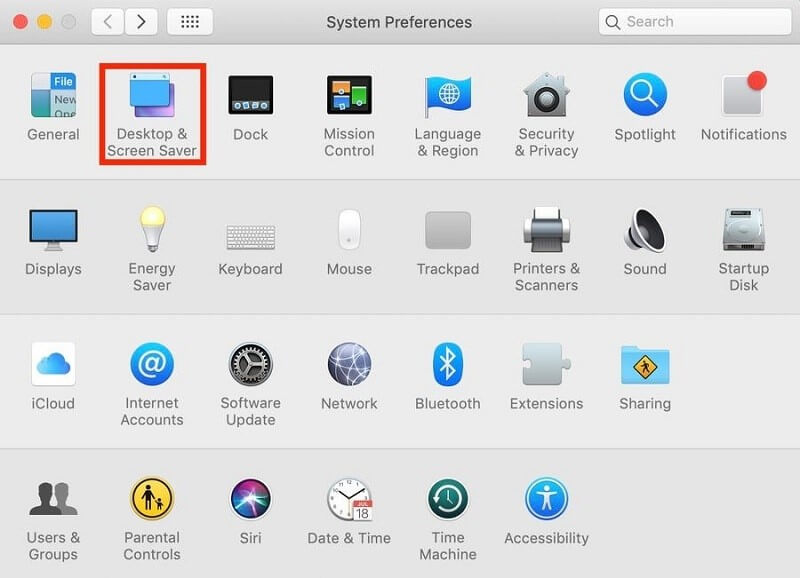
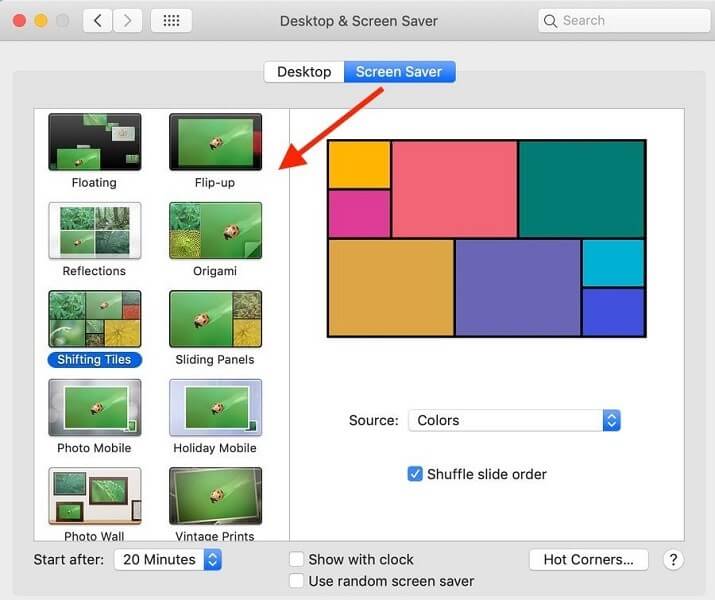
Step 3: In the next window, choose the Screen Saver tab on the upper part beside the Desktop option.
Step 4: Multiple screen saver styles will appear in the left section. Select the one you prefer- a miniature representation of that will appear on the right.
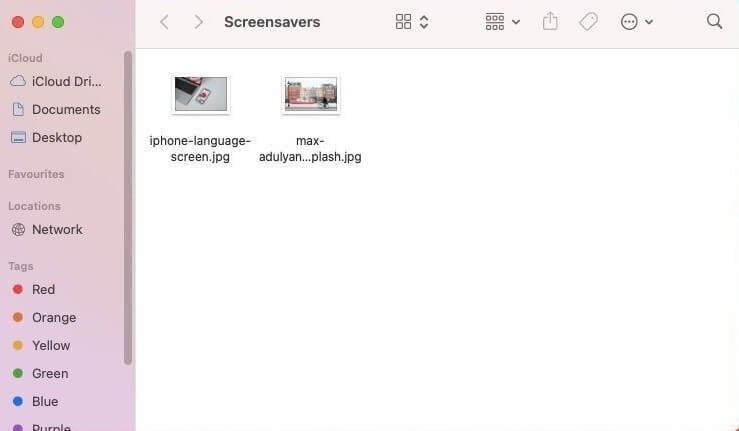
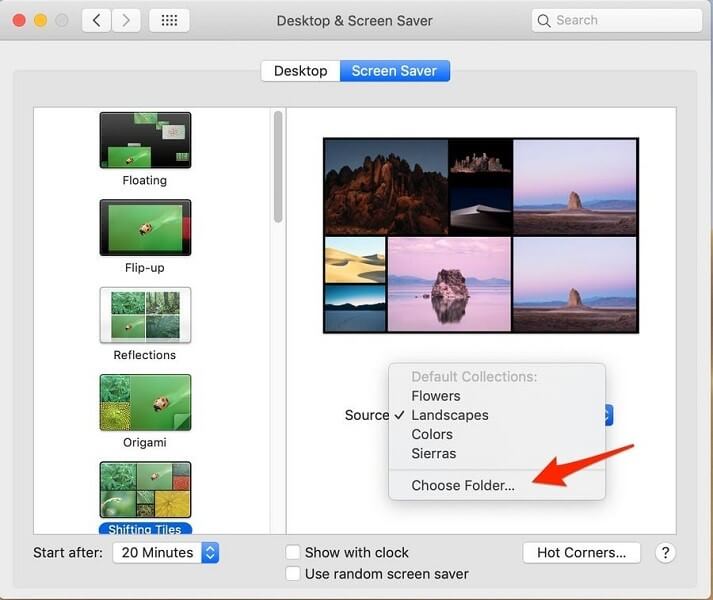
Step 5: Tap on the Source option and select a style like Landscapes. Then hit the “Choose Folder…” section to add your images from the device storage.
Step 6: Hover your mouse over the right-side screen-saver template you made and choose Preview.
Method 3: Password Protect the Mac Screen Saver
You can set a password when you change the screen saver on Mac. This will assure better security for your files when you are away from the screen so other people cannot access and view the screen in your absence. With a pre-saved password, only the device owner can reaccess the Mac device.
How to do this?
Step 1: On Mac, click on System Preferences.
Step 2: Next, choose Security & Privacy and open the General option.
Step 3: You can activate “Require Password” by clicking the checkmark beside it. Set the duration to Immediately.
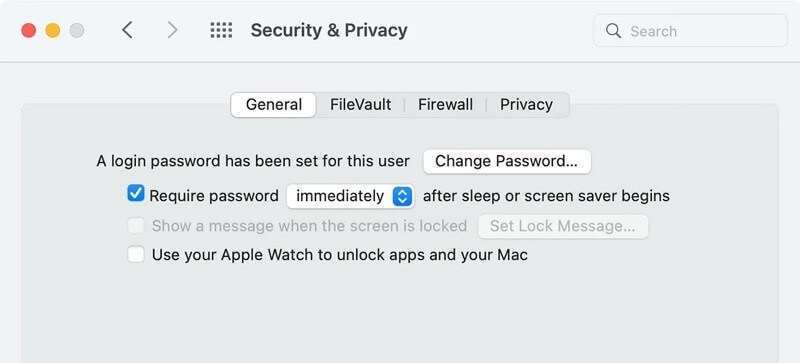
Step 4: When the screen goes idle, and the screen saver activates, the device screen will password lock automatically.
Method 4: Set up the Timer Function for the Screen Saver on Mac
It is possible to set up a screen saver timer if you want to device exactly when the screen saver activates. For example, if a person leaves the system unattended for 5 minutes occasionally, it is better to save the timer accordingly.
However, if one does it regularly, unlocking the screen each time, it locks will get stressful. So, set a customized timing for Screen Saver settings.
How to do this?
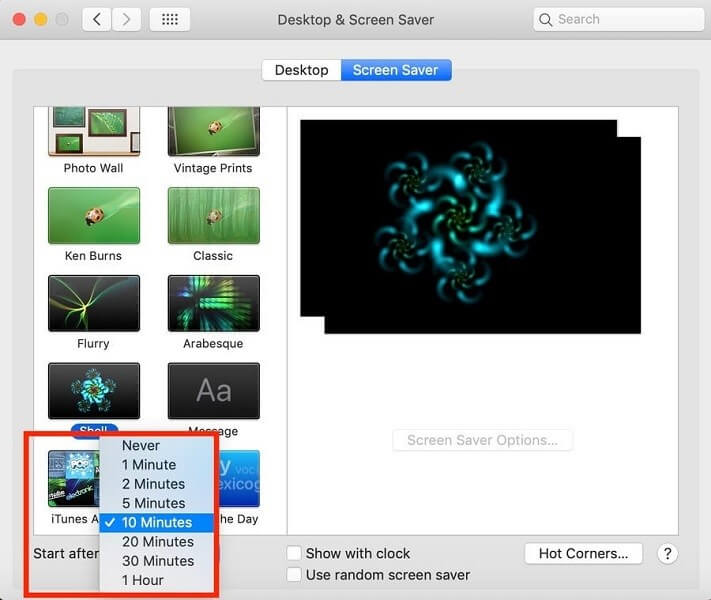
Step 1: On your Mac device, click on System Preferences > Desktop & Screen Saver. Then, tap on the Screen Saver tab. On the other hand, on the macOS 13 computer, click on the Apple menu > System Settings > Screen Saver.
Step 2: Find the “Start After” drop-down menu and click on it.
Step 3: Choose your preferred duration for the screen to stay inactive, after which the screen saver will automatically enable, e.g., 10 minutes.
Conclusion
To sum up, the processes related to making changes to the Mac screen saver are relatively simple. At the same time, you should make sure to follow the steps for each feature adjustment, like adding a password function, feature images/patterns, or setting the timer correctly.
Alternatively, you can use a third-party screen saver program on your computer if you prefer. But these apps are not always safe, so you should use a tool like CleanMyMac X to keep track of your device’s performance, maintenance, and protection work.
Popular Post
Recent Post
How To Adjust Display Appearance Settings Easily in Windows 11/10
Learn to adjust display appearance settings easily Windows offers. Simple guide covers brightness, scaling, resolution & multi-monitor setup for better screen experience.
Supercharge Your Productivity: A Solopreneur’s and SMB’s Guide to Mastering Google Workspace with Gemini’
Picture this. It’s Monday morning. You open your laptop. Email notifications flood your screen. Your to-do list has 47 items. Three clients need proposals by Friday. Your spreadsheet crashed yesterday. The presentation for tomorrow’s meeting is half-finished. Sound familiar? Most small business owners live this reality. They jump between apps. They lose files. They spend […]
9 Quick Tips: How To Optimize Computer Performance
Learn how to optimize computer performance with simple steps. Clean hard drives, remove unused programs, and boost speed. No technical skills needed. Start today!
How To Speed Up My Computer/Laptop Windows 11/10 [2025]
Want to make your computer faster? A slow computer can be really annoying. It takes up your time and makes work more difficult. But with a few easy steps, you can improve your laptop’s speed and make things run more smoothly. Your computer slows down over time. Old files pile up. Programs start with Windows. […]
How To Fix Low Disk Space Error Due To A Full Temp Folder
A low disk space error due to a full temp folder is a common problem. Many users face this issue daily. Your computer stores temporary files in special folders. These files ensure optimal program performance, but they can accumulate as time goes on. When temp folders get full, your system slows down. You might see […]
How to Use Disk Cleanup on This Computer: Step-by-Step Guide
Computers getting slow is just the worst, right? Well, yes! Files pile up on your hard drive. Luckily, the Disk Cleanup tool on your PC is here to save the day. It clears out unnecessary files, giving your system the boost it needs to run smoothly again. A lot of users aren’t aware of the […]
Top 25 Computer Maintenance Tips: Complete Guide [2025]
Computer maintenance tips are vital for every PC user. Without proper PC maintenance, your system will slow down. Files can get lost. Programs may crash often. These computer maintenance tips will help you avoid these problems. Good PC maintenance keeps your computer running fast. It makes your hardware last longer. Regular computer maintenance tips can […]
Reclaiming Disk Space On Windows Without Losing Files: A Complete Guide
Running low on storage can slow down programs and trigger that annoying “low disk space” warning. Files accumulate over time, cluttering the drive. The good news? It’s possible to reclaim space without deleting anything important. Reclaiming disk space on Windows without losing files is easier than you think. Your computer stores many temporary files, old […]
Fix Issues Downloading From the Microsoft Store on Windows 11, 10 PC
Do you get excited when you’re about to download a new app or game? You open the Microsoft Store, click the download button… but nothing happens. Or maybe it starts and then suddenly stops. Sometimes, strange messages pop up like “Something happened on our end” or “Try again later.” That can be really annoying. But […]
Fix Low Disk Space Errors Quickly On Windows 11, 10 PC [2025]
Low disk space errors can slow down your Windows PC. These errors appear when your hard drive runs out of room. Your computer needs space to work properly. When space runs low, programs crash and files won’t save. Windows shows warning messages about low disk space. Your PC may freeze or run slowly. You might […]

