
How To Enable or Disable Recall on Windows 11 [2025]

Recall is a feature in Windows 11 that helps users store and retrieve data quickly. It can be incredibly useful for managing information efficiently. When you enable Recall on Windows 11, you can keep your important data at your fingertips. However, there might be times when you need to disable Recall on Windows 11 for specific reasons, such as freeing up system resources or managing system performance.
Knowing how to enable Recall on Windows 11 or turn off Recall on Windows 11 can significantly enhance your Windows 11 experience. This guide aims to provide you with clear, concise steps to help you manage the Recall feature effectively. Let’s dive into the details and explore how you can make the most of this handy tool.
Recall can streamline your workflow and improve your overall productivity. By managing data efficiently, you can save time and reduce the hassle of searching for important information. Understanding how to enable Recall on Windows 11 and disable Recall on Windows 11 is key to making the most of this feature.
Follow along to learn more about managing Recall on Windows 11.
Part 1: Overview Of Recall AI Feature on Windows 11

Recall is a built-in feature of Windows 11 that allows users to store and access data quickly. This feature can be enabled or disabled based on your needs. To enable Recall on Windows 11, you just need to follow a few simple steps. Similarly, if you need to turn off Recall on Windows 11, the process is straightforward and easy to follow.
Enabling Recall on Windows 11 helps you keep important data within reach, ensuring that you can access it whenever you need it. This can be particularly useful for managing work-related information, personal files, and other essential data. On the other hand, disabling Recall can free up system resources, which can help improve your computer’s performance and efficiency.
The Recall feature is exclusive to the new Copilot+ PCs and is not available on older devices. It leverages the advanced AI capabilities of Copilot+ PCs.
Currently, Recall is available in Preview mode on Snapdragon-powered Copilot+ PCs. It will soon roll out for AMD and Intel-powered Copilot+ PCs in the coming days. The feature is supported in a few selected languages, including English, French, simplified Chinese, German, Japanese, and Spanish.
In time, Recall will become available in more regions.
Part 2: Why Enable Or Disable Recall On Windows 11: How It Helps?
Enabling or disabling Recall on Windows 11 can have several benefits. When you enable Recall on Windows 11, you gain quick access to important data, which can significantly boost productivity and save time. On the other hand, choosing to turn off Recall on Windows 11 can free up system resources, optimizing your computer’s performance.
Whether you’re looking to manage data efficiently or improve system efficiency, understanding the advantages of enabling or disabling Recall on Windows 11 is crucial for tailoring your experience to your needs.
- Boosts productivity: Having quick access to important data can save you time and make your workflow more efficient.
- Saves important data: Recall ensures that your essential information is stored and easily accessible when needed.
- Retrieves information quickly: With Recall enabled, you can quickly access the data you need without searching through multiple files.
- Frees up system resources when disabled: Disabling Recall can help improve your computer’s performance by freeing up system resources.
- Adapts to user needs: The flexibility of the Recall feature allows you to enable or disable it based on your specific requirements and preferences.
Part 3: How To Enable Recall Windows 11
Enabling Recall on Windows 11 is a straightforward process that allows you to quickly access important data and enhance your productivity. By following a few simple steps in the Settings app, you can easily enable Recall on Windows 11 and ensure that your essential information is readily available whenever you need it.
This part of the guide will walk you through the steps to enable this useful feature, making it simple for you to take advantage of Recall’s benefits on your Windows 11 device.
Here’s how to Enable Recall Windows 11:
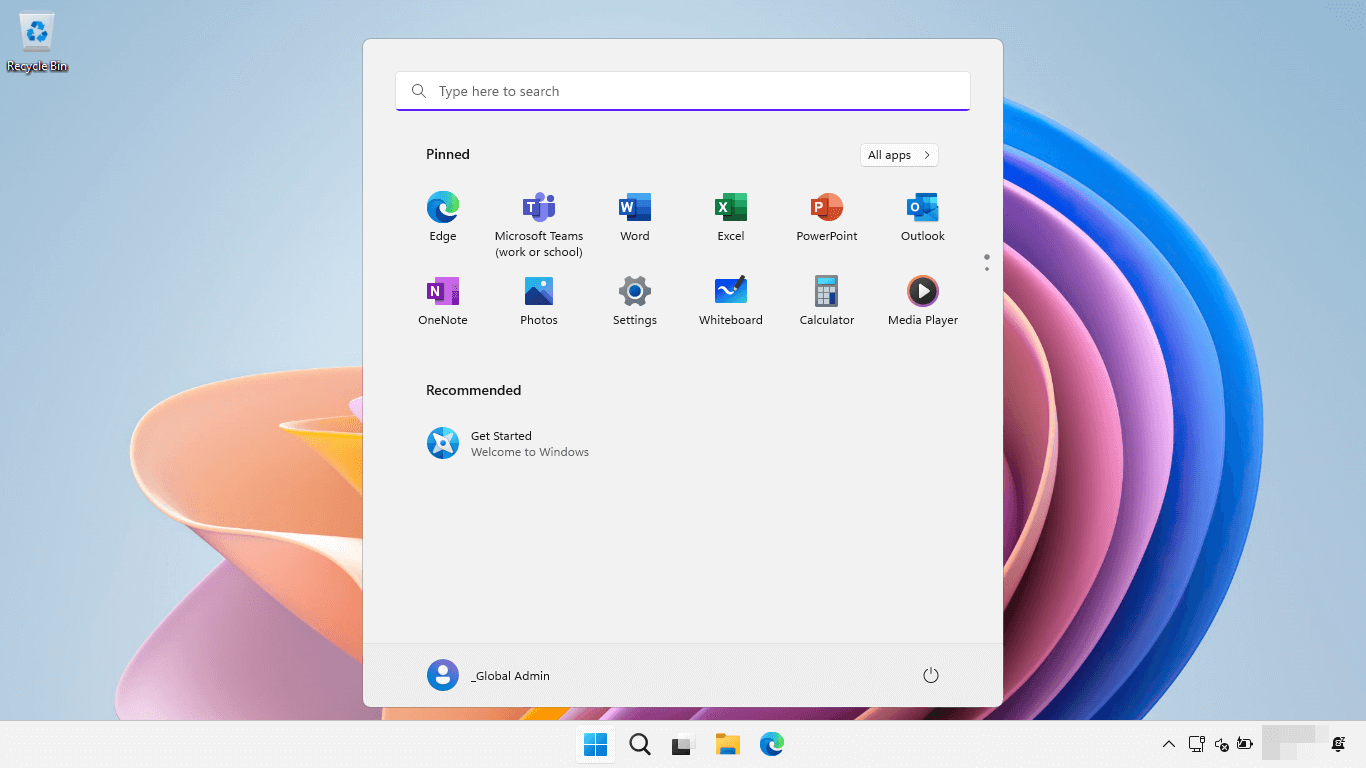
Step 1: Click on the Start menu and select the Settings icon (a gear-shaped icon) to open the Settings app. In the Settings app, click on “Privacy and Security” to access the system settings. In the System settings, find and click on the “Recall and Snapshots” option to access the Recall settings.
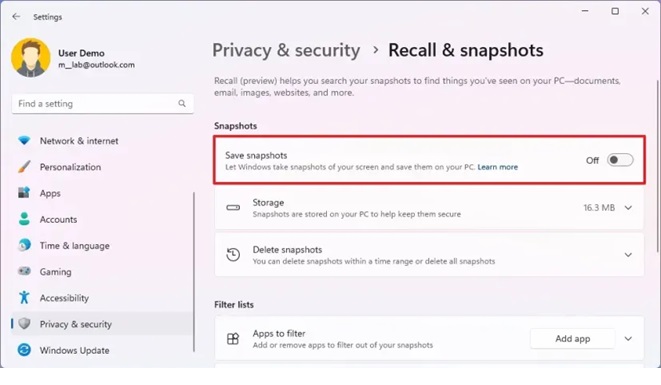
Step 2: In the Recall settings, find the Save Snapshots toggle switch and move it to the “On” position to enable Recall.
Step 3: After enabling Recall, make sure to confirm the changes by clicking “Apply” or “OK” if prompted.
Part 4: How To Turn Off Recall Windows 11
Disabling Recall on Windows 11 is just as straightforward as enabling it. Knowing how to turn off Recall on Windows 11 can be beneficial when you need to free up system resources or optimize your computer’s performance.
This part of the guide will walk you through the steps to easily disable the Recall feature, allowing you to manage your system settings efficiently and ensure your device runs smoothly when Recall is not needed.
Step 1: Click on the Start menu and select the Settings icon to open the Settings app. In the Settings app, click on “System” to access the system settings.

Step 2: In the System settings, find and click on the “Recall and Snapshots” option to access the Recall settings. In the Recall settings, find the toggle switch and move it to the “Off” position to disable Recall. After disabling Recall, make sure to confirm the changes by clicking “Apply” or “OK” if prompted.
Part 5: What Would Happen If I Turn Off Recall on Windows 11?
Disabling Recall on Windows 11 can have some noticeable effects on your system’s performance and data management. By turning off Recall, you can free up valuable system resources and potentially give your computer a nice speed boost.
However, it also means you might lose that quick access to certain data that Recall managed. Understanding the upsides and downsides of disabling Recall will help you make the best choice.
Here’s what you can expect:
- Free Up System Resources: Turning off Recall can free up RAM and CPU usage, making your computer run more efficiently.
- Improved System Speed: With more resources available, your device could run faster and more smoothly.
- Reduced Background Processes: Fewer background processes might lead to a more responsive system.
- Limited Data Access: You might lose the convenience of quickly accessing data managed by Recall.
- Potential Data Management Adjustment: You may need to find alternative ways to store and retrieve your important information.
- Improved Battery Life: With fewer processes running, your device’s battery life could see an improvement.
- Less Disk Space Usage: Turning off Recall can free up disk space that was being used to store data.
- Possible Security Benefits: With fewer active features, there’s a reduced surface area for potential vulnerabilities.
It’s all about finding the right balance that suits your needs. If performance is a top priority, disabling Recall might be the way to go. But if you rely heavily on quick data access, keeping it enabled could be more beneficial. The choice is yours!
Part 6: Tips To Use Recall On Windows 11
Using Recall on Windows 11 effectively can greatly enhance your productivity and data management experience. By customizing Recall settings to fit your specific needs and regularly updating them, you can ensure optimal performance.
Additionally, backing up important data and monitoring system performance when Recall is enabled will help you make the most of this feature. This part of the guide will provide you with practical tips to use Recall on Windows 11 efficiently, ensuring that you can manage your data effortlessly and keep your system running smoothly.
- Regularly update Recall settings: Make sure to keep your Recall settings up to date to ensure optimal performance.
- Ensure you back up important data: Always back up your important data to avoid losing it in case of system issues.
- Customize Recall settings to fit your needs: Adjust the Recall settings to match your specific requirements and preferences.
- Monitor system performance when Recall is enabled: Keep an eye on your system’s performance to ensure that Recall is not affecting it negatively.
- Disable Recall on Windows 11 if not in use: If you don’t need the Recall feature, consider disabling it to free up system resources.
Conclusion
Recall is an essential feature in Windows 11 that helps in managing and retrieving data efficiently. By enabling Recall, you can boost productivity and keep your important information within reach. On the other hand, you can turn off Recall to optimize system performance and free up resources. Understanding how to enable Recall on Windows 11 and turn off Recall on Windows 11 is crucial for making the most of this feature.
The flexibility to enable or disable Recall on Windows 11 ensures that you can tailor your system to your needs. This guide provides you with the necessary steps to manage Recall effectively. Use these tips to get the most out of Windows 11 and make managing data easier.
By following this guide, you can enhance your Windows 11 experience and ensure that your system is optimized for your specific requirements. Whether you need to store data for quick access or improve system performance by disabling Recall, this guide has you covered.
FAQs:
1. What is Recall on Windows 11?
Recall is a built-in feature of Windows 11 designed to help users manage, store, and retrieve important data quickly and efficiently. By enabling Recall, you can keep essential information at your fingertips, making it easier to access when needed. This feature is particularly useful for organizing work-related files, personal documents, and other data that you frequently use. Recall streamlines the data management process, ensuring that your important information is always within reach.
2. Why should I enable Recall on Windows 11?
Enabling Recall on Windows 11 offers several benefits, including increased productivity and better data management. When Recall is enabled, you can quickly access and retrieve important data without having to search through multiple files or folders. This saves you time and effort, allowing you to focus on your tasks and work more efficiently. Additionally, Recall helps you stay organized by keeping your essential information in one easily accessible location. Enabling Recall can significantly enhance your overall Windows 11 experience.
3. How do I turn off Recall Windows 11?
Disabling Recall on Windows 11 is a simple process that can help optimize your computer’s performance. To turn off Recall, open the Settings app, navigate to the System section, and click on Recall. From there, you can switch the toggle to the “Off” position to disable the feature. Confirm the changes by clicking “Apply” or “OK” if prompted. Disabling Recall can free up system resources, allowing your computer to run more smoothly and efficiently, especially if you no longer need the feature.
4. Will disabling Recall free up system resources?
Yes, disabling Recall on Windows 11 can free up system resources, which can improve your computer’s performance and efficiency. When Recall is disabled, the system no longer needs to allocate resources to manage and store data through this feature. As a result, you may notice a boost in overall performance, including faster processing speeds and improved responsiveness. Disabling Recall is particularly beneficial if you have limited system resources or if you no longer need the feature for data management.
Author Bio:
Dinesh Lakhwani 
Dinesh Lakhwani, the entrepreneurial brain behind “TechCommuters,” achieved big things in the tech world. He started the company to make smart and user-friendly tech solutions. Thanks to his sharp thinking, focus on quality and the motto of never giving up, TechCommuters became a top player in the industry. His commitment to excellence has propelled the company to a leading position in the industry.
Popular Post


Recent Post

How To Adjust Display Appearance Settings Easily in Windows 11/10
Learn to adjust display appearance settings easily Windows offers. Simple guide covers brightness, scaling, resolution & multi-monitor setup for better screen experience.

Supercharge Your Productivity: A Solopreneur’s and SMB’s Guide to Mastering Google Workspace with Gemini’
Picture this. It’s Monday morning. You open your laptop. Email notifications flood your screen. Your to-do list has 47 items. Three clients need proposals by Friday. Your spreadsheet crashed yesterday. The presentation for tomorrow’s meeting is half-finished. Sound familiar? Most small business owners live this reality. They jump between apps. They lose files. They spend […]

9 Quick Tips: How To Optimize Computer Performance
Learn how to optimize computer performance with simple steps. Clean hard drives, remove unused programs, and boost speed. No technical skills needed. Start today!

How To Speed Up My Computer/Laptop Windows 11/10 [2025]
Want to make your computer faster? A slow computer can be really annoying. It takes up your time and makes work more difficult. But with a few easy steps, you can improve your laptop’s speed and make things run more smoothly. Your computer slows down over time. Old files pile up. Programs start with Windows. […]

How To Fix Low Disk Space Error Due To A Full Temp Folder
A low disk space error due to a full temp folder is a common problem. Many users face this issue daily. Your computer stores temporary files in special folders. These files ensure optimal program performance, but they can accumulate as time goes on. When temp folders get full, your system slows down. You might see […]
How to Use Disk Cleanup on This Computer: Step-by-Step Guide
Computers getting slow is just the worst, right? Well, yes! Files pile up on your hard drive. Luckily, the Disk Cleanup tool on your PC is here to save the day. It clears out unnecessary files, giving your system the boost it needs to run smoothly again. A lot of users aren’t aware of the […]

Top 25 Computer Maintenance Tips: Complete Guide [2025]
Computer maintenance tips are vital for every PC user. Without proper PC maintenance, your system will slow down. Files can get lost. Programs may crash often. These computer maintenance tips will help you avoid these problems. Good PC maintenance keeps your computer running fast. It makes your hardware last longer. Regular computer maintenance tips can […]

Reclaiming Disk Space On Windows Without Losing Files: A Complete Guide
Running low on storage can slow down programs and trigger that annoying “low disk space” warning. Files accumulate over time, cluttering the drive. The good news? It’s possible to reclaim space without deleting anything important. Reclaiming disk space on Windows without losing files is easier than you think. Your computer stores many temporary files, old […]

Fix Issues Downloading From the Microsoft Store on Windows 11, 10 PC
Do you get excited when you’re about to download a new app or game? You open the Microsoft Store, click the download button… but nothing happens. Or maybe it starts and then suddenly stops. Sometimes, strange messages pop up like “Something happened on our end” or “Try again later.” That can be really annoying. But […]

Fix Low Disk Space Errors Quickly On Windows 11, 10 PC [2025]
Low disk space errors can slow down your Windows PC. These errors appear when your hard drive runs out of room. Your computer needs space to work properly. When space runs low, programs crash and files won’t save. Windows shows warning messages about low disk space. Your PC may freeze or run slowly. You might […]