How to Handle Android Studio Installation in Windows 11/10?

Last updated on September 2nd, 2023 at 4:31 am
Introduction
Windows operating systems come with many high-quality software configurations, some pre-built for Windows OS while some not. One notable software is Android Studio, which is highly related to Android app development. It comes equipped with many tools and features necessary for creating robust Android apps.
You can download and do Android Studio setup in Windows 10/11, but it can take some complex configuration steps to complete. Yet, you can do the installation if you carefully take the right steps.
What is Android Studio?
Running with IntelliJ IDEA (JetBrains), Android Studio is a notable IDE, mainly related to Android app development. It includes various features that coding experts utilize for development projects, like a blended environment, a flexible build system (Grade-centric), etc.
There is a feature-rich emulator here for coding work, NDK/C++ support, and built-in integration of the Google Cloud Platform.
System Requirements:
The following are the main system requirements you should know about before beginning the Android Studio setup in Windows.
- System compatibility- Windows 11/10/8/7
- Disk Space- Available disk space of 2-4 GB, Recommended 12 GB (at least 1.5 GB for Android Emulator/Android SDK + 500 for IDEA).
- RAM- Minimum 4 GB RAM, Recommended 8 GB RAM (Additional 1 GB RAM for Android Emulator)
- Screen Resolution- Minimum 1280 x 800
- CPU specifications- 2nd or higher Intel Core Processor, x86_64 CPU architecture, or AMD CPU + Hypervisor Support
Process of Android Studio Installation in Windows 11/10
After checking if the system requirements for the installation of Android Studio are compatible, you can begin the process. For that, there are different sequences you should learn about and follow carefully. We studied and broke down all of these methods.
Stage 1: Download/Install Java JDK
Before beginning the installation of Android Studio, you need to prepare the Java environment on your Windows 11/10 device. So, the first step involves installing and setting up Java JDK (Java Development Kit).
This is highly important as a development package that users operate to build Java-centric apps. Besides that, developers can use this package for Java-based app code testing. So, first, one should download it on their Windows 11 or 10 system.
How to do this?
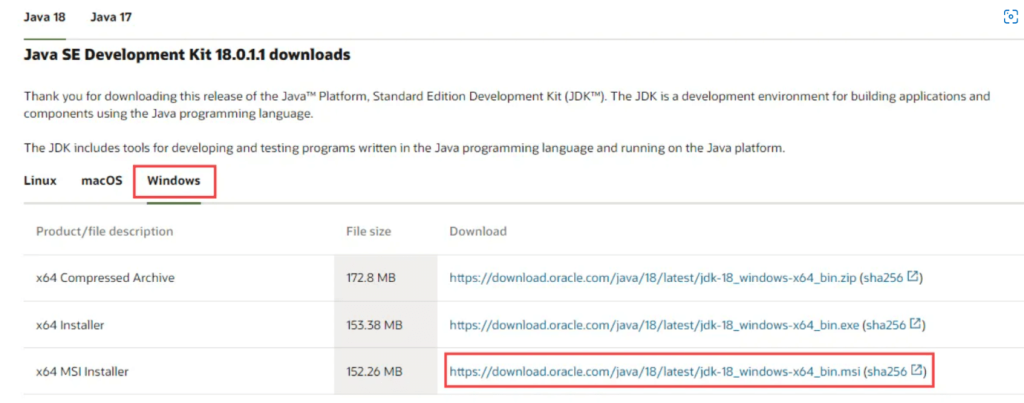
Step 1: Visit the Oracle Java official website for downloads.
Step 2: Search and select the most recent Java JDK version from the given list. Under the Windows section, download its x64 MSI Installer option.
Step 3: After downloading it, access the Downloads section and open the file you received.
Step 4: Then, read through the on-screen instructions that come up and install the JDK.
Stage 2: Set up Java JDK Environment
During the Android Studio setup in the Windows process, you should kickstart the Java environment setup first after the installation of the Java JDK completes successfully. Follow the steps carefully to do this process. The Android Studio software would access the Java environment to operate securely later.
To note, there is no need to reconfigure Environmental Variables during this process if they are already done. For first-time users, doing the steps are important to decrease multiple coding errors and issues during compilation.
How to do this?
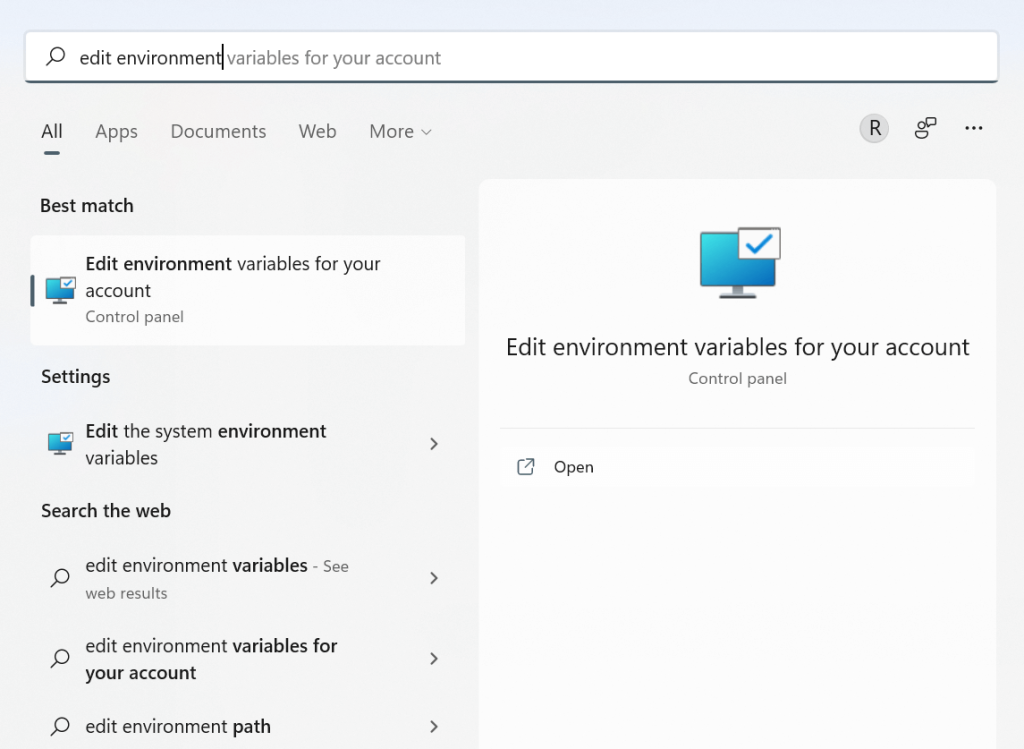
Step 1: Access the Windows search field through the given icon and type in the phrase- Edit Environment variables. Hit Enter to access this feature.
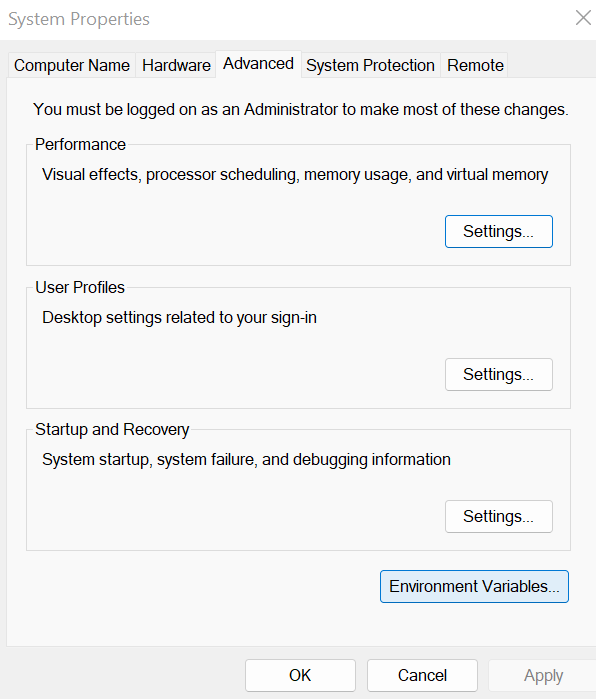
Step 2: Find and choose the Environmental Variables button. Press it.
Step 3: In the next window that appears, find the “System Variables” portion in the lower part of the window. Then, click on Path > Edit > New.
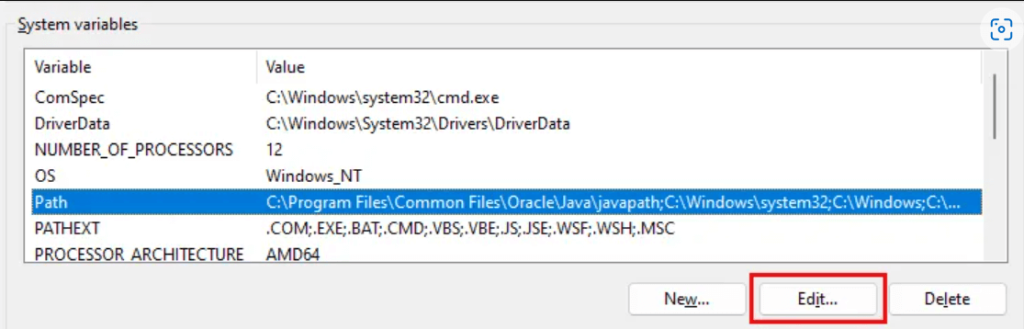
Step 4: Next, copy the folder path for the JKD binaries specifically on your device. Here is an example: C:\Program Files\Java\jdk-18.0.1.1\bin.
Step 5: Go back to the tab for Environmental Variables. Here, paste the copied path and save.
Step 6: Then, click on the User Variables section, and press the New button.
Step 7: Under the box for a variable name that appears, type in PATH_HOME. Under the box for variable value, add the path you added.
Step 8: Click on the OK button to complete the process.
Stage 3: Download and Install Android Studio
Next, you can begin the installation of Android Studio on your device. The process for this is the same for Windows 11 and 10, but there may be some variations depending on device and model differences.
How to do this?
Step 1: Download the developer’s Android Studio zip file or executable version.
Step 2: Press the Download button.
Step 3: On the next slide, click the checkbox for the “I have read and agree with the above terms and conditions” option.
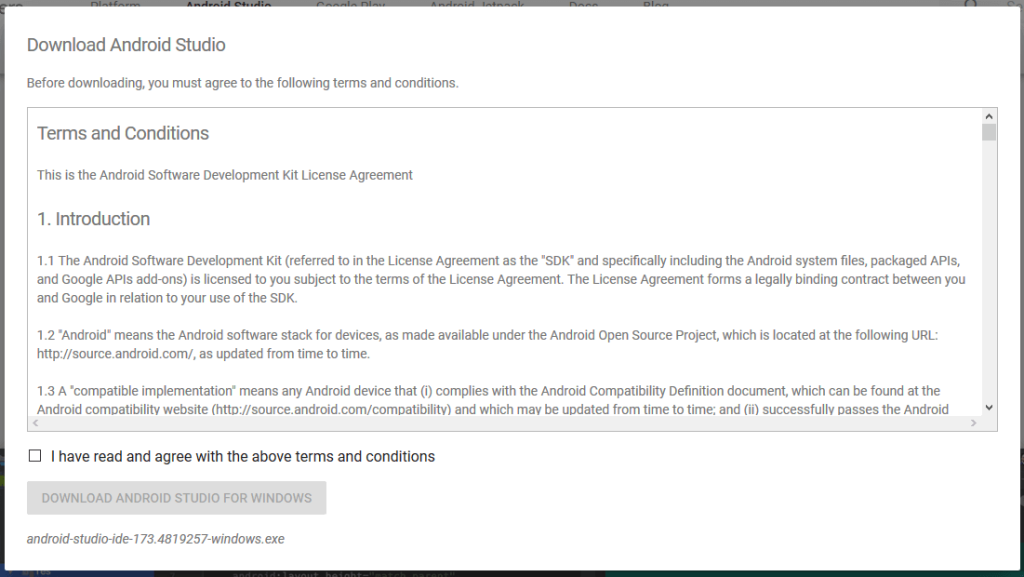
Step 4: When the next prompt box appears, click the “Save File” option. This will start the file downloading process.
Step 5: Then, access the Downloads section to access this file. Click on it to run the software and begin the installation process.
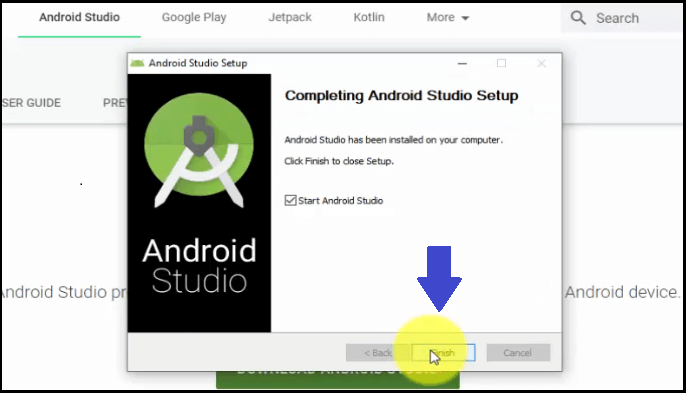
Step 6: After the installation completes, you should click the “Next” button to proceed.
Step 7: In the following window that appears, click Finish.
Step 8: The system would then ask the user if they want to import previous Android Studio settings if they downloaded the software before. For best results, click the “Do not Import Settings” choice.
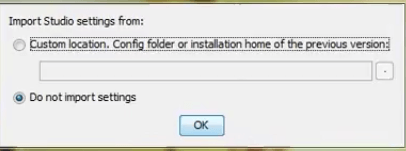
Step 9: Press OK.
Step 10: The Android Studio software would start up and then search for any present SDK Components in the system.
Step 11: After the software finds the necessary SDK components, you will get redirected toward the Welcome dialog box.
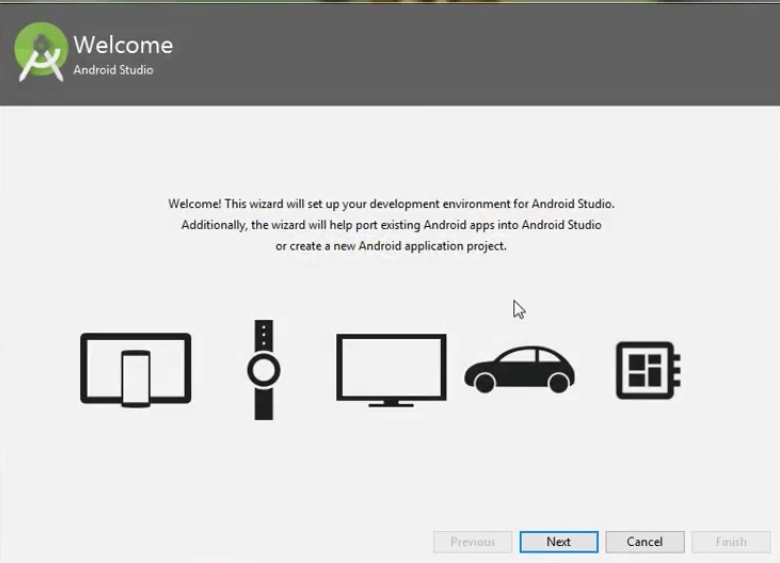
Step 12: Press the Next button.
Step 13: The Install Type window will appear. Here, select the Standard option and press Next.
Step 14: After that, you have to choose the preferred UI Theme. Two options are available- Darcula (Dark theme) and IntelliJ (Light theme).

Make your choice, and then click on the Next button.
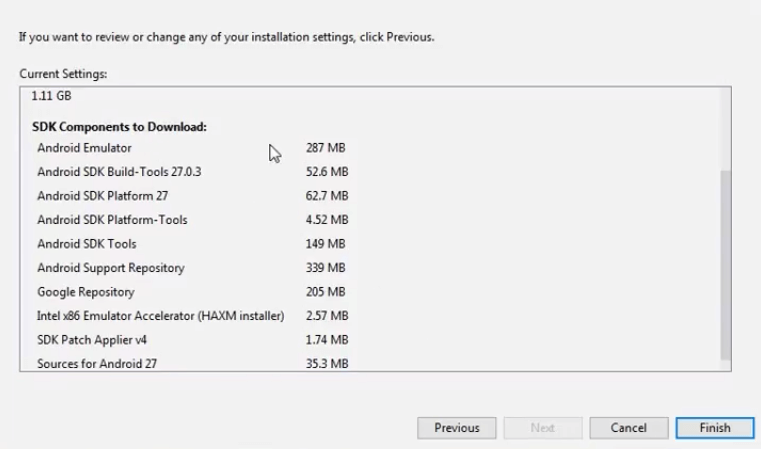
Step 15: The next window will show the available SDK Components to download. Press the Finish button to start the downloading process of each. This can take some time to complete the full process, typically around 15 to 30 minutes.
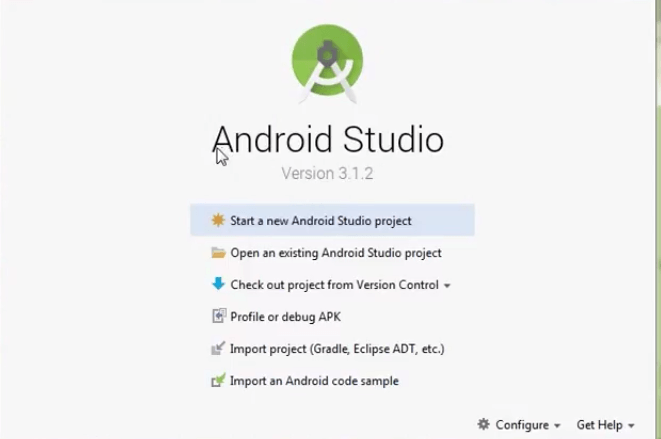
Step 16: After the configuring of Android Studio is complete; you can use it to create new apps.
Step 17: To begin, click on the “Start a new Android Studio project” option.
Conclusion
On Windows 10 or 11, you can install Android Studio suitably for Android app development work. Before that, you have to install and set up the Java JDK in the device since that will allow the software to operate appropriately. Follow all of the steps for the Android Studio installation and setup process cautiously, and customize the app theme.
If you found this post enlightening about the topic you were searching for, there are more such guides we have published. Read through them if interested, and let us know your thoughts.
Author Bio:
Dinesh Lakhwani 
Dinesh Lakhwani, the entrepreneurial brain behind “TechCommuters,” achieved big things in the tech world. He started the company to make smart and user-friendly tech solutions. Thanks to his sharp thinking, focus on quality and the motto of never giving up, TechCommuters became a top player in the industry. His commitment to excellence has propelled the company to a leading position in the industry.
Popular Post


Recent Post

How To Adjust Display Appearance Settings Easily in Windows 11/10
Learn to adjust display appearance settings easily Windows offers. Simple guide covers brightness, scaling, resolution & multi-monitor setup for better screen experience.

Supercharge Your Productivity: A Solopreneur’s and SMB’s Guide to Mastering Google Workspace with Gemini’
Picture this. It’s Monday morning. You open your laptop. Email notifications flood your screen. Your to-do list has 47 items. Three clients need proposals by Friday. Your spreadsheet crashed yesterday. The presentation for tomorrow’s meeting is half-finished. Sound familiar? Most small business owners live this reality. They jump between apps. They lose files. They spend […]

9 Quick Tips: How To Optimize Computer Performance
Learn how to optimize computer performance with simple steps. Clean hard drives, remove unused programs, and boost speed. No technical skills needed. Start today!

How To Speed Up My Computer/Laptop Windows 11/10 [2025]
Want to make your computer faster? A slow computer can be really annoying. It takes up your time and makes work more difficult. But with a few easy steps, you can improve your laptop’s speed and make things run more smoothly. Your computer slows down over time. Old files pile up. Programs start with Windows. […]

How To Fix Low Disk Space Error Due To A Full Temp Folder
A low disk space error due to a full temp folder is a common problem. Many users face this issue daily. Your computer stores temporary files in special folders. These files ensure optimal program performance, but they can accumulate as time goes on. When temp folders get full, your system slows down. You might see […]
How to Use Disk Cleanup on This Computer: Step-by-Step Guide
Computers getting slow is just the worst, right? Well, yes! Files pile up on your hard drive. Luckily, the Disk Cleanup tool on your PC is here to save the day. It clears out unnecessary files, giving your system the boost it needs to run smoothly again. A lot of users aren’t aware of the […]

Top 25 Computer Maintenance Tips: Complete Guide [2025]
Computer maintenance tips are vital for every PC user. Without proper PC maintenance, your system will slow down. Files can get lost. Programs may crash often. These computer maintenance tips will help you avoid these problems. Good PC maintenance keeps your computer running fast. It makes your hardware last longer. Regular computer maintenance tips can […]

Reclaiming Disk Space On Windows Without Losing Files: A Complete Guide
Running low on storage can slow down programs and trigger that annoying “low disk space” warning. Files accumulate over time, cluttering the drive. The good news? It’s possible to reclaim space without deleting anything important. Reclaiming disk space on Windows without losing files is easier than you think. Your computer stores many temporary files, old […]
Fix Issues Downloading From the Microsoft Store on Windows 11, 10 PC
Do you get excited when you’re about to download a new app or game? You open the Microsoft Store, click the download button… but nothing happens. Or maybe it starts and then suddenly stops. Sometimes, strange messages pop up like “Something happened on our end” or “Try again later.” That can be really annoying. But […]

Fix Low Disk Space Errors Quickly On Windows 11, 10 PC [2025]
Low disk space errors can slow down your Windows PC. These errors appear when your hard drive runs out of room. Your computer needs space to work properly. When space runs low, programs crash and files won’t save. Windows shows warning messages about low disk space. Your PC may freeze or run slowly. You might […]