
How to Upgrade RAM on a Laptop?
Last updated on June 3rd, 2024 at 10:05 am
Whether running on Windows, Linux, or macOS, most laptop models have a lot of storage and space. However, the laptop gets sluggish in its performance with more programs, services, and apps a user adds. Older laptops especially bog down faster with more tabs open or freeze up.
You can download apps like CCleaner to optimize the system, detect background running apps/services, and remove unnecessary files. Another necessary solution is to Upgrade the RAM on a laptop. In this post, that is we cover it in more detail.
Considerations Before Upgrading RAM on a Laptop
Before you can work on how to increase RAM in a laptop, you should check the maximum capacity of RAM in the device you are using. The amount of available RAM in a PC determines how many programs can operate on the system simultaneously. It influences the command response time of the system.
So, to understand the right RAM to upgrade, know the set parameters for the hardware and the OS by the device manufacturer.
Operating System
First, check the operating system of your laptop, like macOS or Windows.
- Mac– For the Mac devices, the 2006-2009 iMac models have 4 GB RAM, 2010-2012 (late) iMac models hold 16 GB RAM, and iMac 2013 (late) models have 32 GB of RAM. You cannot install the RAM if it does suit the PC model.
- Windows– For Windows laptops, check the type of processor first- 32-bit/64-bit. Choose RAM with the capacity indicated by the manufacturer. The limits are 2 TB of RAM on Windows Pro, Education, and Enterprise models with 64-bit processors, 128 GB of RAM on Windows Home models with 64-bit processors, and 3 GB of RAM in Windows laptops with 32-bit processors.
Hardware
Check the RAM space of the operating system in your laptop to know how to increase RAM in the laptop with said OS. If it is not compatible with the hardware, the upgrade cannot work. Checking the following points is important.
- Search about access to product documentation online
- Find motherboard documentation
- Operate a system cleaner software, like CCleaner for Windows or CleanMyMac X for macOS devices.
Methods to Upgrade RAM on a laptop
The steps on how to increase RAM in laptop devices are not complex, especially time-consuming, or extremely costly. However, users need to follow the process carefully to avoid system defects, damage, or inconsistent performance. For your better experience, we present the right methods to carry out RAM upgradation.
Method 1: Check the Occupied Space on Laptop
Before one can Upgrade RAM on a laptop, it is important to check the available RAM on the device. This is important to understand the type of RAM with the necessary capacity you need to install into the system.
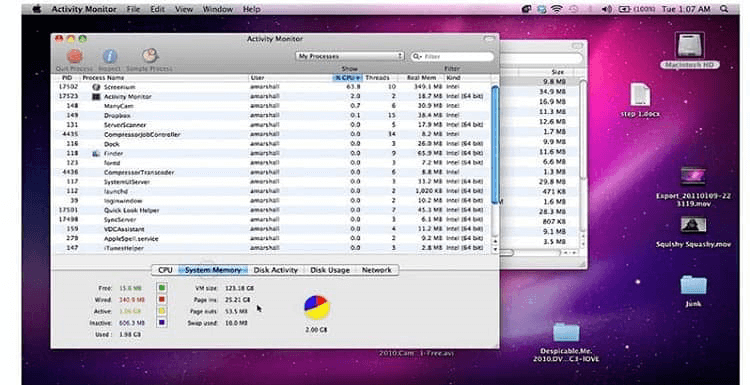
How to do this for Mac laptops?
Step 1: On the Mac home screen, click on the Finder option to open the window.
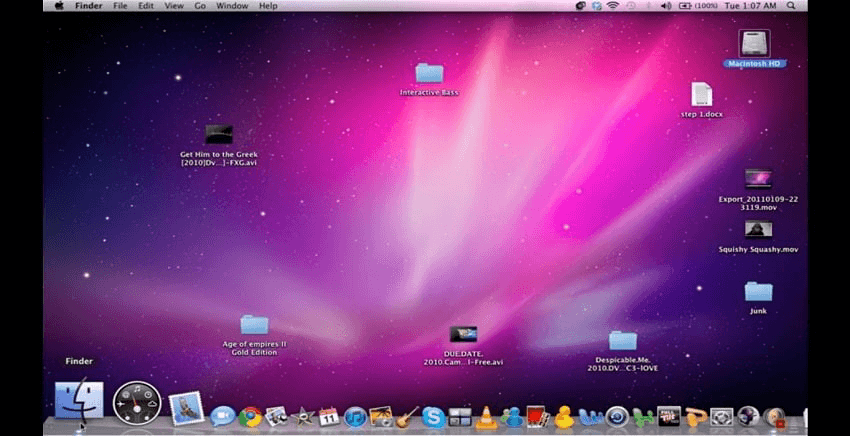
Step 2: Among the options that come up, choose the “Utilities” tab and click on it.
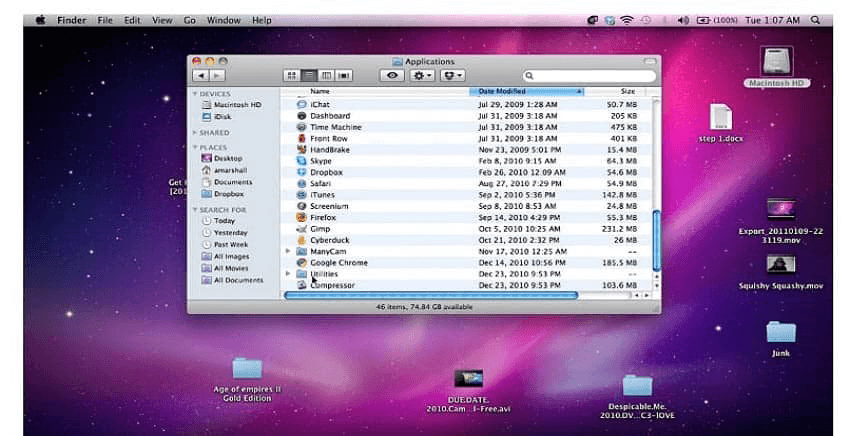
Step 3: Double-click your cursor on the “Activity Monitor” option to open the next window.
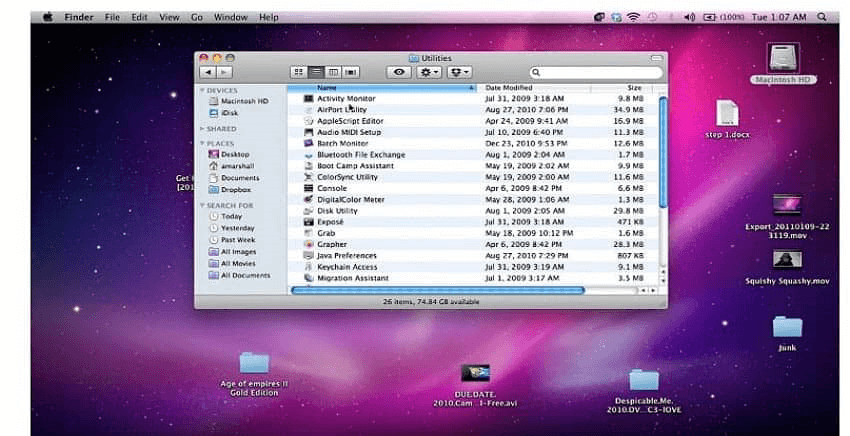
Step 4: Choose the “System Memory” tab. That would display the overall space that is in use within the device.
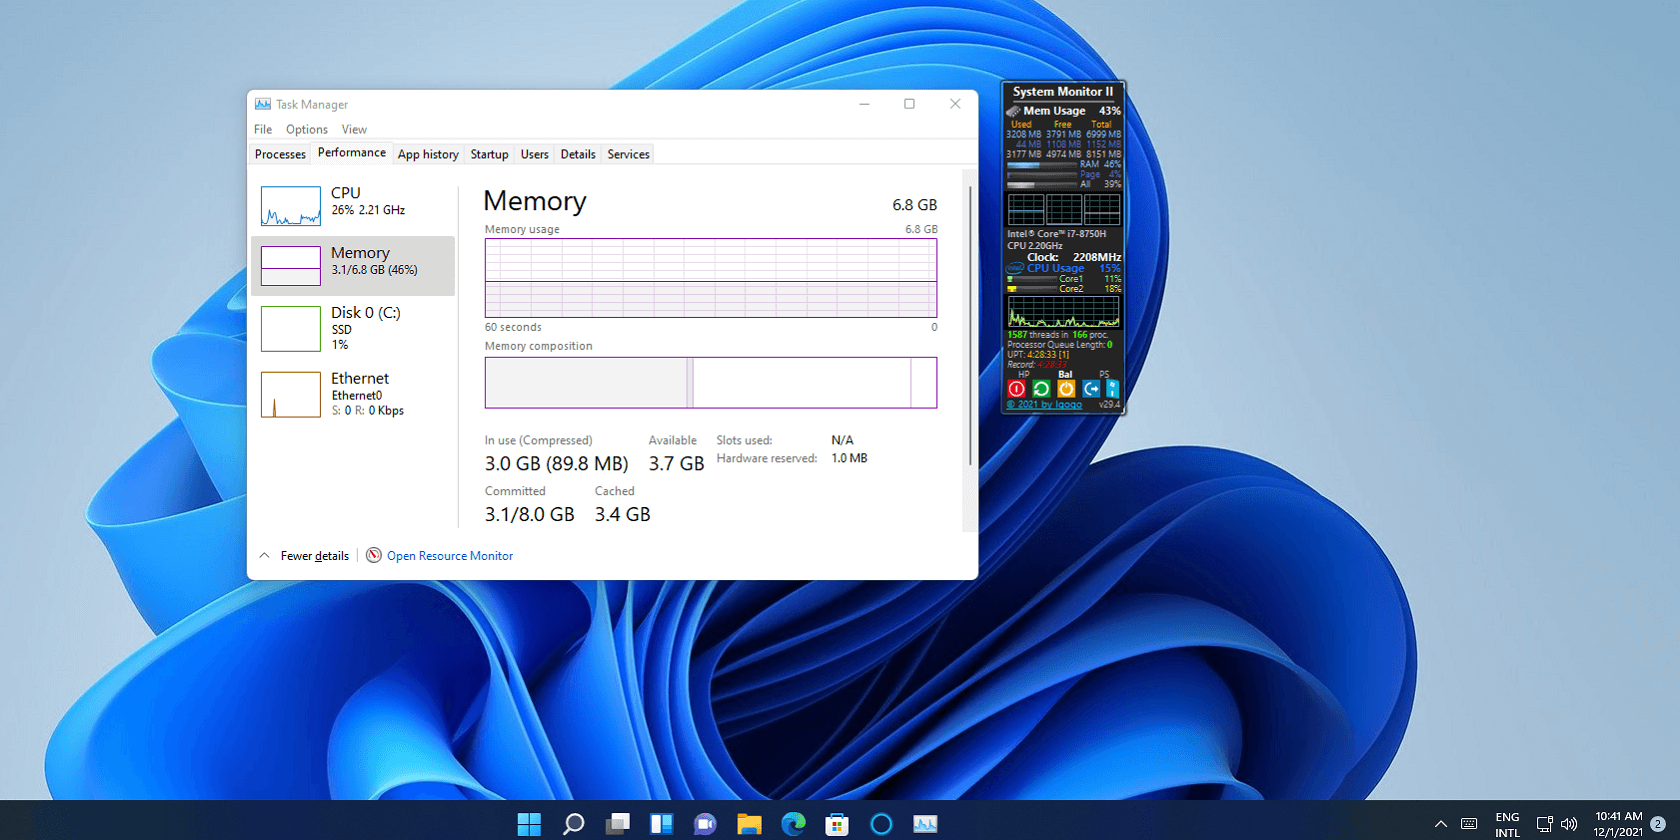
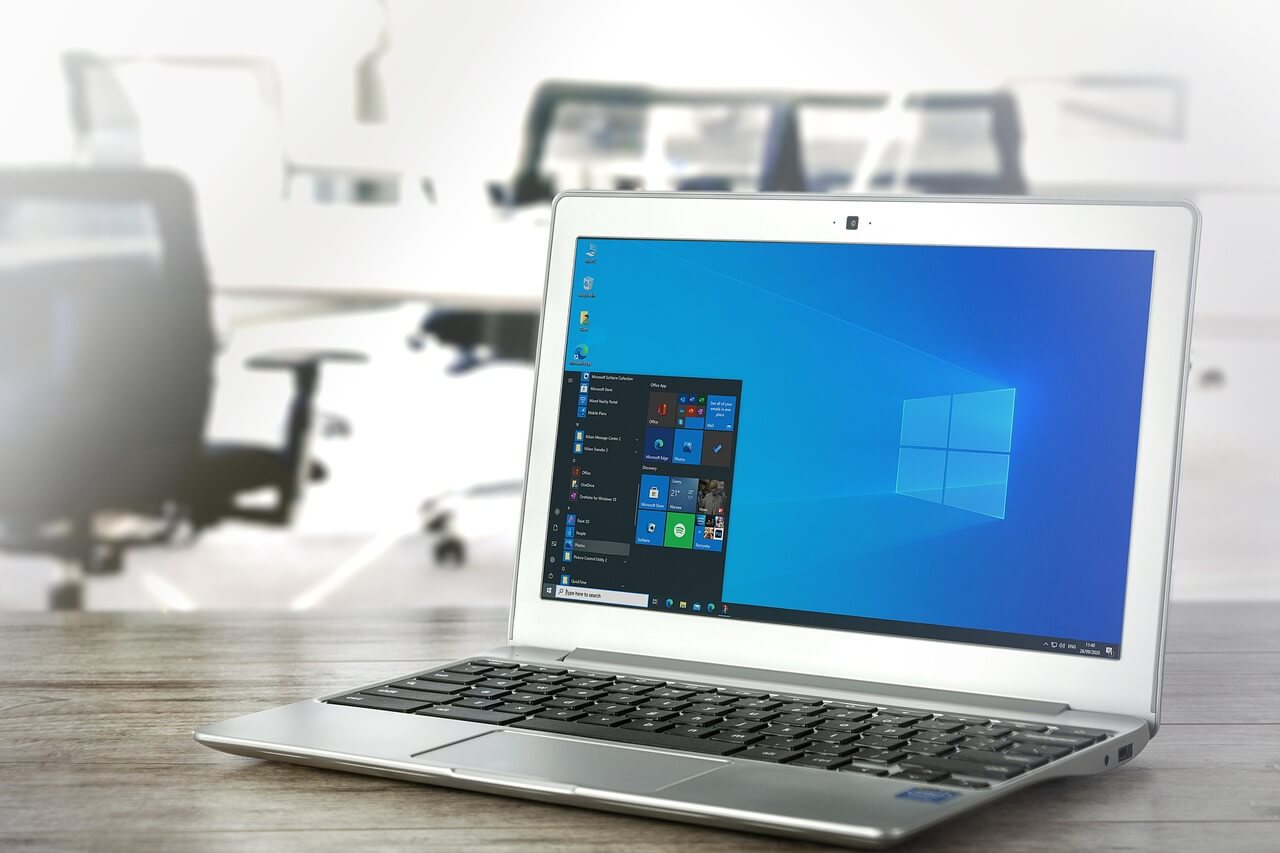
How to do this for Windows laptops?
Step 1: Click on the Start icon on your Windows home screen taskbar at the bottom.
Step 2: Type the term “Task Manager” into the search text field.
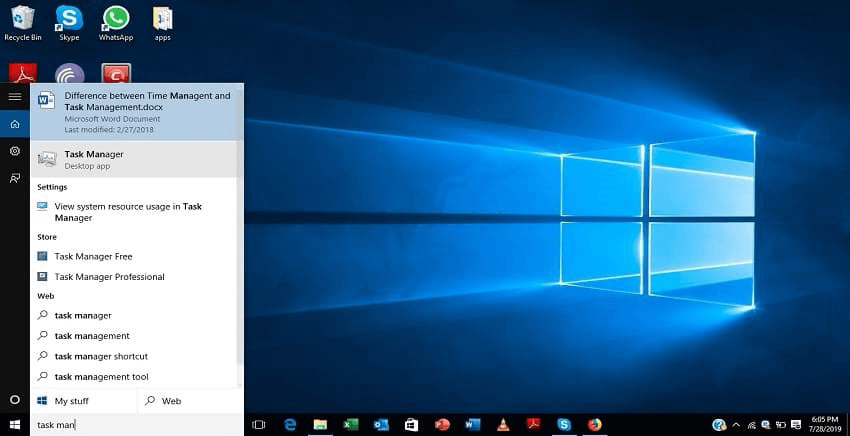
Step 3: Then, click on top of the Task Manager app option that comes up and opens. It would open the Task Manager menu.
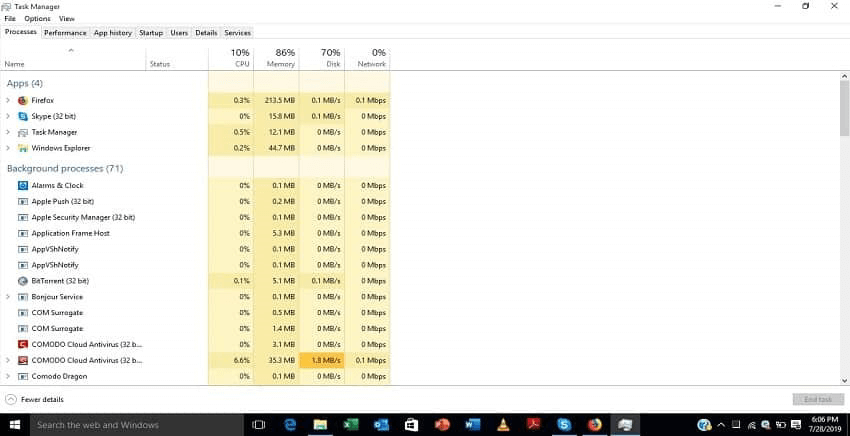
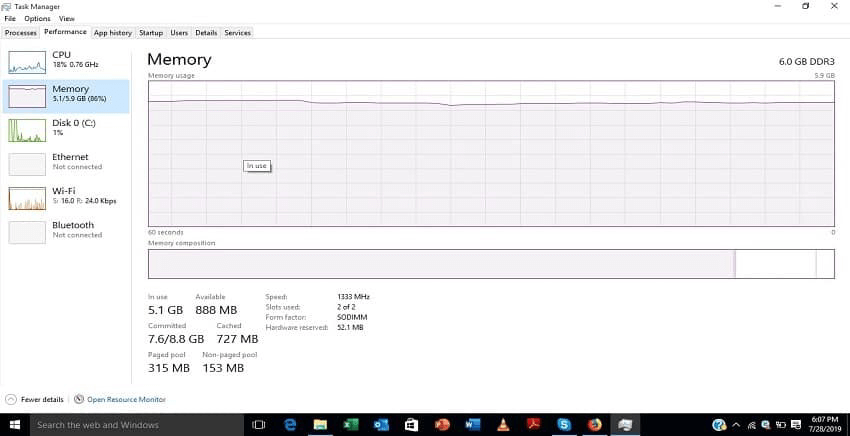
Step 4: Choose the “Performance Tab” option.
Step 5: Click on the “Memory” option. The details about the current space status are visible.
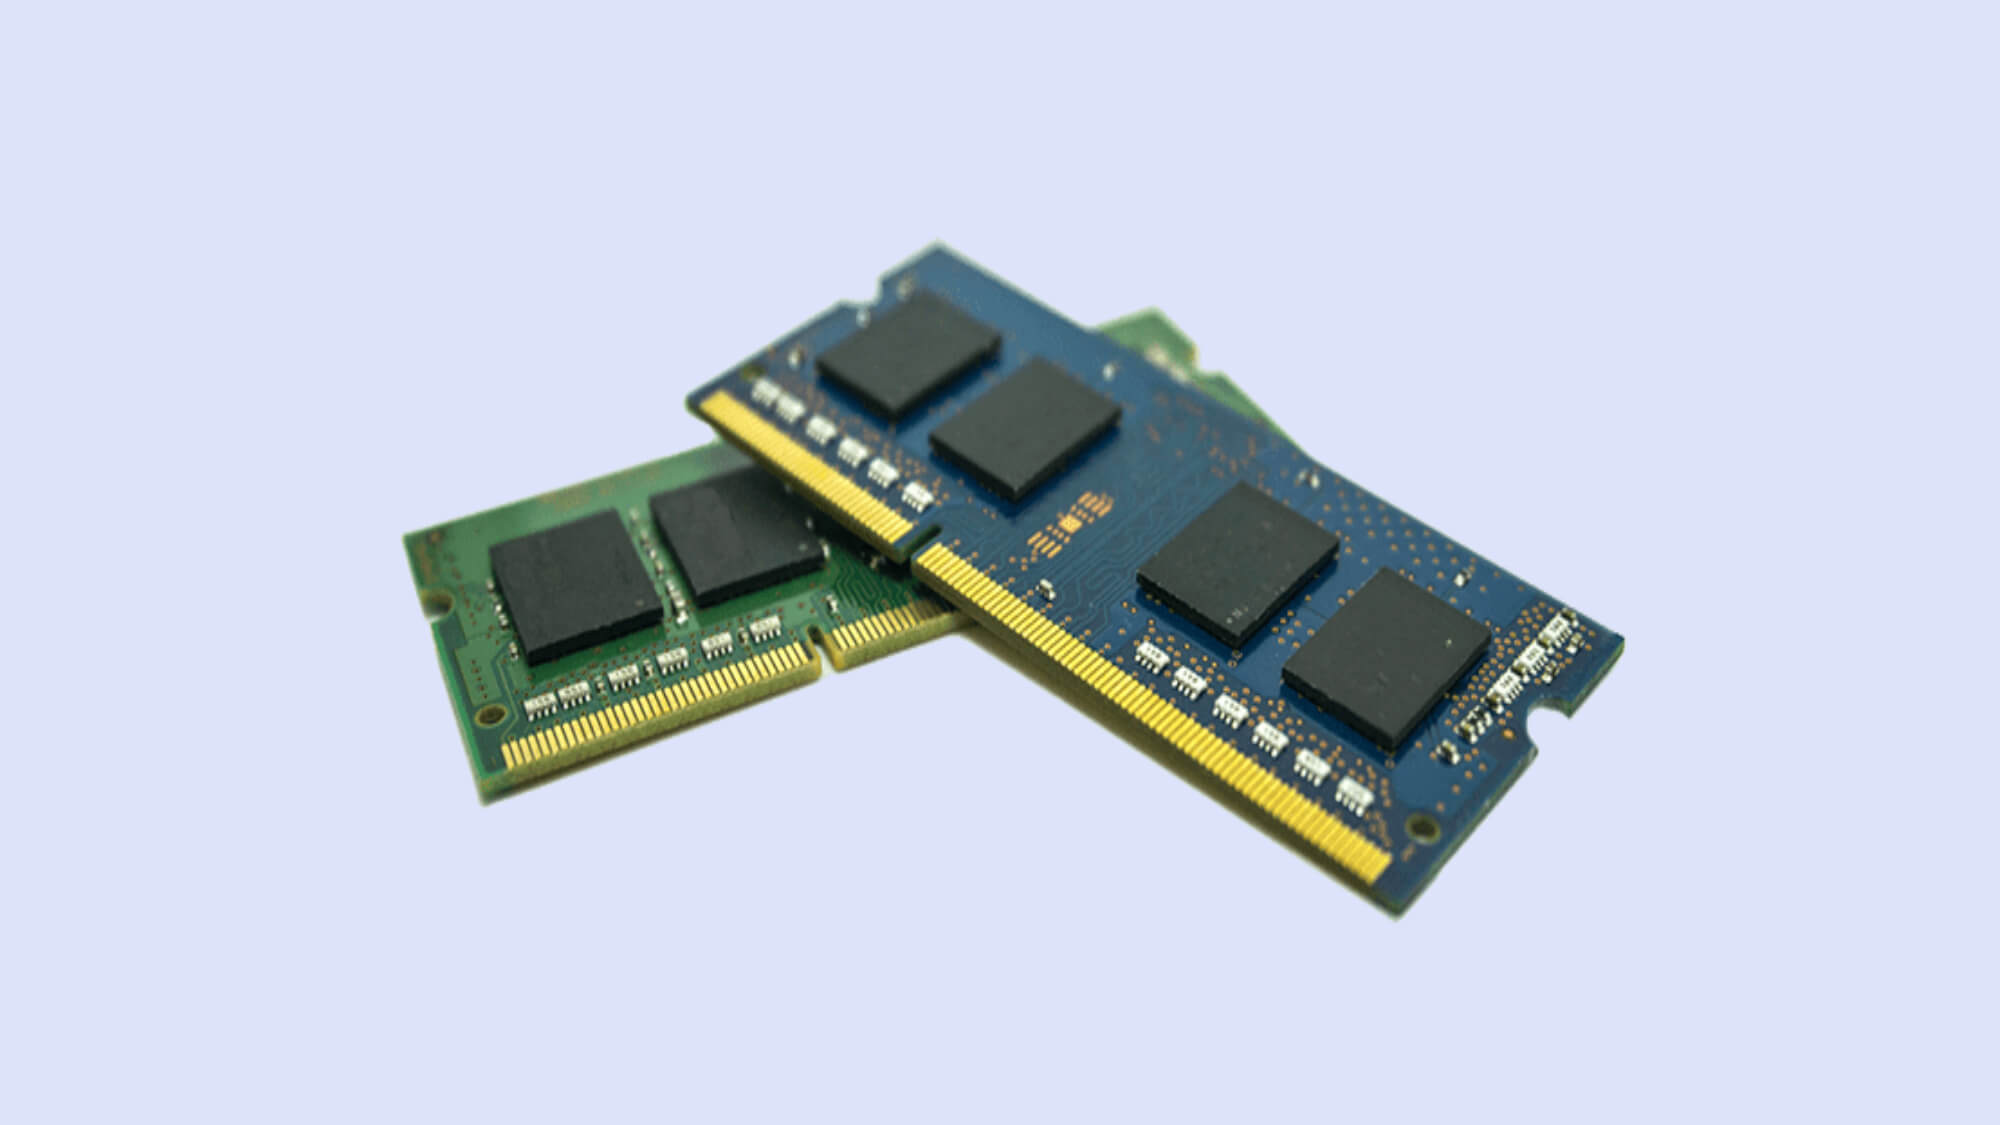
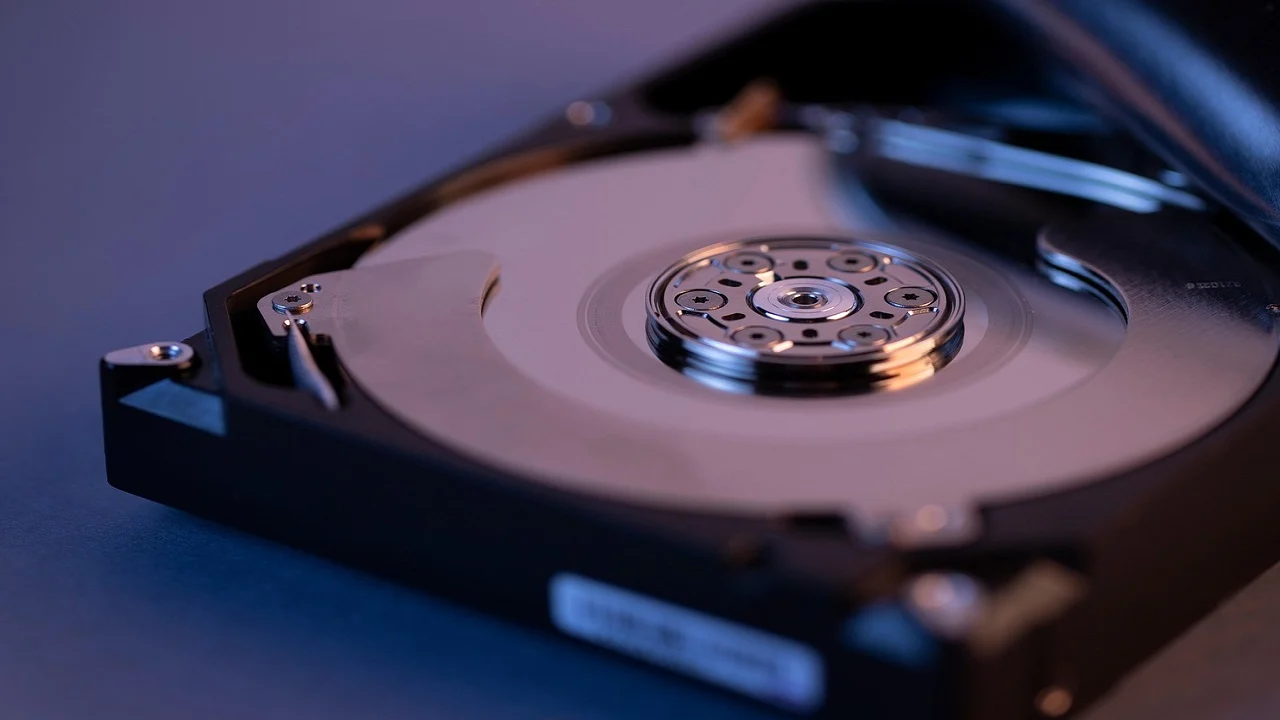
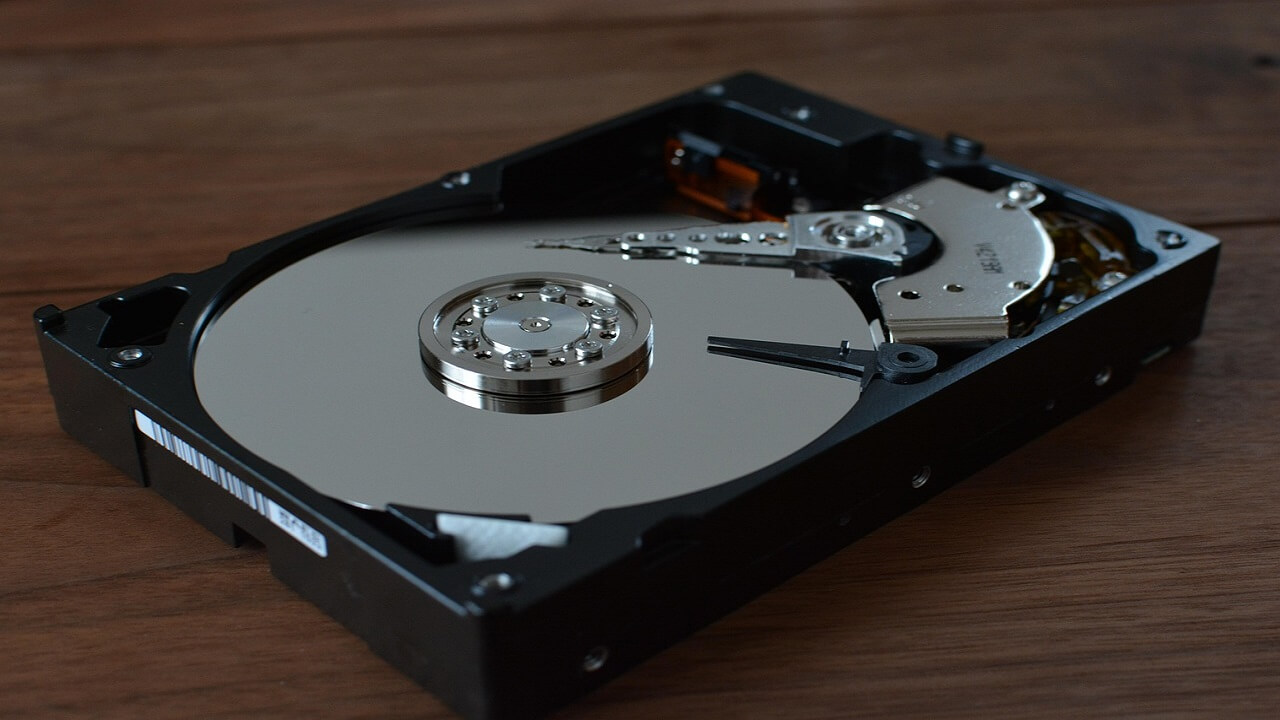
Method 2: Replace RAM Hardware Part in the Device
After checking the amount of RAM space left and choosing the RAM type, you have to open the device back portion to Upgrade RAM on a laptop. You can take steps to replace RAM in the laptop device safely. Here, we discuss the right sequence to follow. Do these steps carefully.
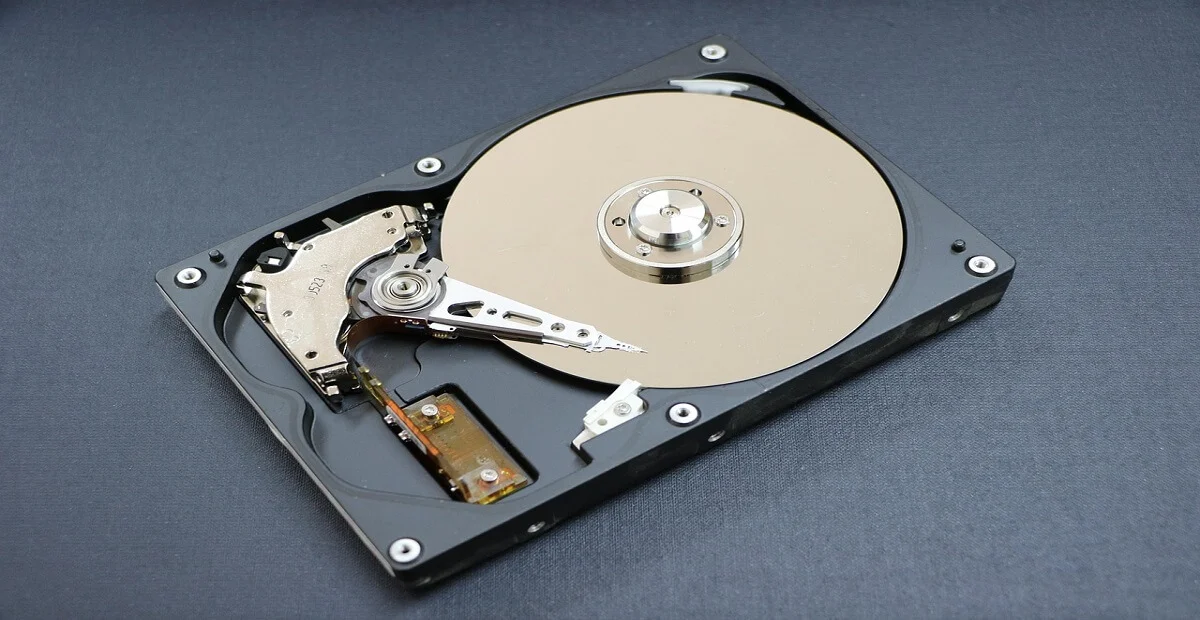
How to do this?
Step 1: Use a screwdriver to remove all of the screws holding the laptop backplate in place.
In some laptops, a strip of rubber feet covers the screws. Cautiously peel it off.
Step 2: Take a small tool and slowly pry open the backplate of the laptop to see the device’s internal part. Start putting it off from a looser point that you pry up with the tool.
Step 3: If there is a metal plate that is protecting the RAM, gently pull away part of its tape or unscrew the metal part.
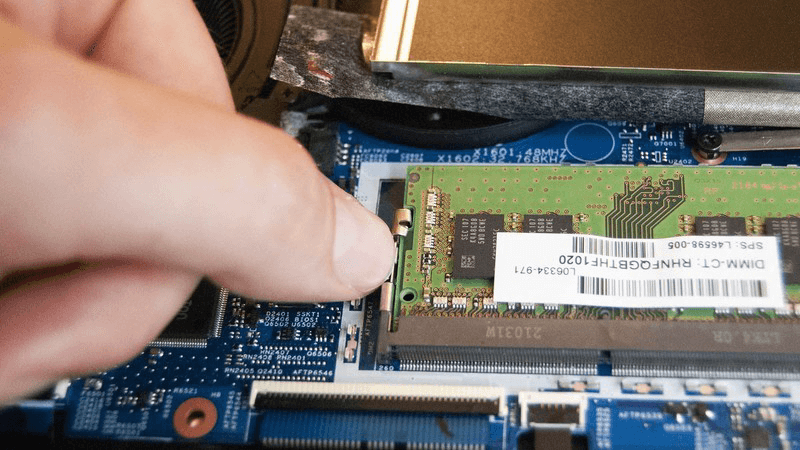
If metallic arms or clamps at the side hold the RAM in place, unfasten them or push them away cautiously. The RAM is free to take off. In some devices, the RAM pops out partially at this point.
Step 4: Pull this RAM gently from the slot space. Make sure to do this step at an angle to avoid damaging the laptop or RAM.
Step 5: Then, push the new RAM into the spot gently. When you hear a noticeable click sound, that indicates that the RAM is placed into the slot perfectly.
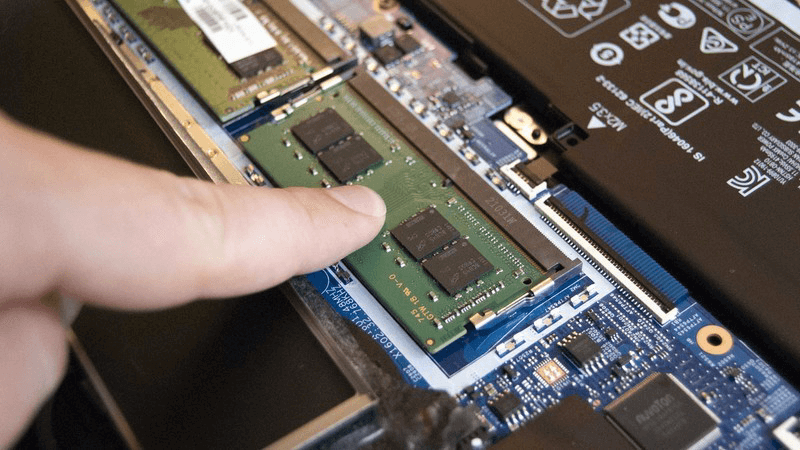
Repeat these steps for the other available RAM module as well, if necessary.
Step 6: Tape the piece back in the correct place for laptops with a RAM shield.
Step 7: Place the backplate of the laptop into place and then apply a little bit of pressure to put it perfectly. If you hear an audible clicking sound, it means that the backplate is attached well.
Step 8: Use a screwdriver to put all the screws in place. If there were rubber feet that you removed in Step 1, fix it in the right area at the end.
Method 3: Check the RAM Upgrade
After completing the hardware changing stage of how to increase RAM in the laptop process, you should check to see if it worked. Switch on your device after some minutes for the system to reorient properly. Take around 5 minutes.
How to do this?
Step 1: Power the PC back on.
Step 2: Click on the Start button on your device, like on Windows 10 laptops. You can then click on the System option that comes up.
Step 3: For Windows 11 devices or even 10 devices, type the term Task Manager into the search field after clicking on the Search icon on the home screen taskbar.
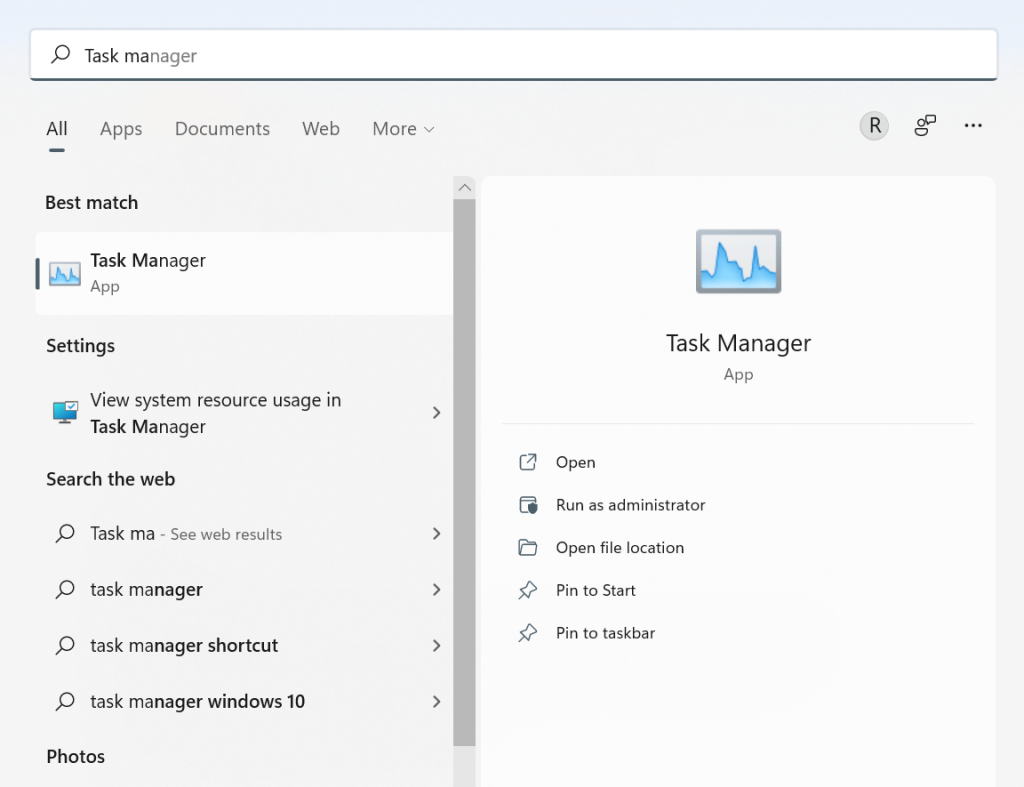
Step 4: Choose the Task Manager option
Step 5: Check the Memory option from the list. You can view the available RAM space.
Conclusion
Before starting the upgrading process for the laptop RAM, users need to check the available memory on the device. Also, make sure that you are using compatible software/hardware for your laptop device model. Follow the given sequence of steps and handle the hardware checking portion carefully. Take professional help, if necessary.
Found this post helpful? Please check out other posts on diverse software-related matters and get back to us with your thoughts.
Author Bio:
Dinesh Lakhwani 
Dinesh Lakhwani, the entrepreneurial brain behind “TechCommuters,” achieved big things in the tech world. He started the company to make smart and user-friendly tech solutions. Thanks to his sharp thinking, focus on quality and the motto of never giving up, TechCommuters became a top player in the industry. His commitment to excellence has propelled the company to a leading position in the industry.
Popular Post


Recent Post

Supercharge Your Productivity: A Solopreneur’s and SMB’s Guide to Mastering Google Workspace with Gemini’
Picture this. It’s Monday morning. You open your laptop. Email notifications flood your screen. Your to-do list has 47 items. Three clients need proposals by Friday. Your spreadsheet crashed yesterday. The presentation for tomorrow’s meeting is half-finished. Sound familiar? Most small business owners live this reality. They jump between apps. They lose files. They spend […]

9 Quick Tips: How To Optimize Computer Performance
Learn how to optimize computer performance with simple steps. Clean hard drives, remove unused programs, and boost speed. No technical skills needed. Start today!

How To Speed Up My Computer/Laptop Windows 11/10 [2025]
Want to make your computer faster? A slow computer can be really annoying. It takes up your time and makes work more difficult. But with a few easy steps, you can improve your laptop’s speed and make things run more smoothly. Your computer slows down over time. Old files pile up. Programs start with Windows. […]
How To Fix Low Disk Space Error Due To A Full Temp Folder
A low disk space error due to a full temp folder is a common problem. Many users face this issue daily. Your computer stores temporary files in special folders. These files ensure optimal program performance, but they can accumulate as time goes on. When temp folders get full, your system slows down. You might see […]
How to Use Disk Cleanup on This Computer: Step-by-Step Guide
Computers getting slow is just the worst, right? Well, yes! Files pile up on your hard drive. Luckily, the Disk Cleanup tool on your PC is here to save the day. It clears out unnecessary files, giving your system the boost it needs to run smoothly again. A lot of users aren’t aware of the […]

Top 25 Computer Maintenance Tips: Complete Guide [2025]
Computer maintenance tips are vital for every PC user. Without proper PC maintenance, your system will slow down. Files can get lost. Programs may crash often. These computer maintenance tips will help you avoid these problems. Good PC maintenance keeps your computer running fast. It makes your hardware last longer. Regular computer maintenance tips can […]
Reclaiming Disk Space On Windows Without Losing Files: A Complete Guide
Running low on storage can slow down programs and trigger that annoying “low disk space” warning. Files accumulate over time, cluttering the drive. The good news? It’s possible to reclaim space without deleting anything important. Reclaiming disk space on Windows without losing files is easier than you think. Your computer stores many temporary files, old […]

Fix Issues Downloading From the Microsoft Store on Windows 11, 10 PC
Do you get excited when you’re about to download a new app or game? You open the Microsoft Store, click the download button… but nothing happens. Or maybe it starts and then suddenly stops. Sometimes, strange messages pop up like “Something happened on our end” or “Try again later.” That can be really annoying. But […]
Fix Low Disk Space Errors Quickly On Windows 11, 10 PC [2025]
Low disk space errors can slow down your Windows PC. These errors appear when your hard drive runs out of room. Your computer needs space to work properly. When space runs low, programs crash and files won’t save. Windows shows warning messages about low disk space. Your PC may freeze or run slowly. You might […]
How To Uninstall Software From My Computer: Complete Guide [2025]
Learning how to uninstall software from my computer is a key skill. Every PC user needs to know this. Old programs take up space. They slow down your system. Unused software creates clutter. When you remove a program from computer, you free up storage. Your PC runs faster. You also fix issues caused by bad […]