
What to Do When You’re Unable to Eject a USB Drive on Windows 11?
Last updated on December 17th, 2024 at 6:14 am
Are you unable to eject a USB drive on Windows 11? Then, that’s a serious problem because forced USB drive removal can corrupt or damage your data.
Thus, always launch the File Explorer app, right-click on the external drive, and select Eject. This is the safest way to de-attach a USB drive from your computer.
But, unfortunately, when your USB doesn’t show in the Safely Remove Hardware option, it gets harder to pull out the external drive at the right time.
Why Are You Not Able to Eject USB Drive on Windows 11?
There are several possible reasons behind the USB drive not safely ejecting from your computer. For instance, you might be unable to eject a USB drive on Windows 11 when:
- The external hard drive content is still running in an application installed on your computer.
- As a result, the USB drive might get infected with computer viruses or malware, leading to the Safely Remove Hardware option not showing.
- Your USB drivers have become corrupted or obsolete.
9 Solutions to Try When Unable to Eject USB Drive on Windows 11
USB drives are a vital source to store and transfer data today. Thus, when you are unable to safely eject a USB drive, don’t try to force-eject it. You will only lose your external drive data in the process.
So, when not able to eject an external hard drive on Windows 11, just try these solutions:
Solution 1. Restart Your PC
When your USB content is used by any program installed on your computer, it might not show the Safely Remove Hardware option. If you don’t know which app is using your USB content at the moment, you can simply restart your computer. Restarting action will automatically shut down all operations, including external hard disk content. To restart your computer:
Step 1. Press the Windows key and click on the Power icon from the popup dialogue box.
Step 2. Click on Restart from the small menu.
Step 3. When your system prepares for shutdown, it automatically closes all active programs. Once your PC reboot, try to eject your USB device.
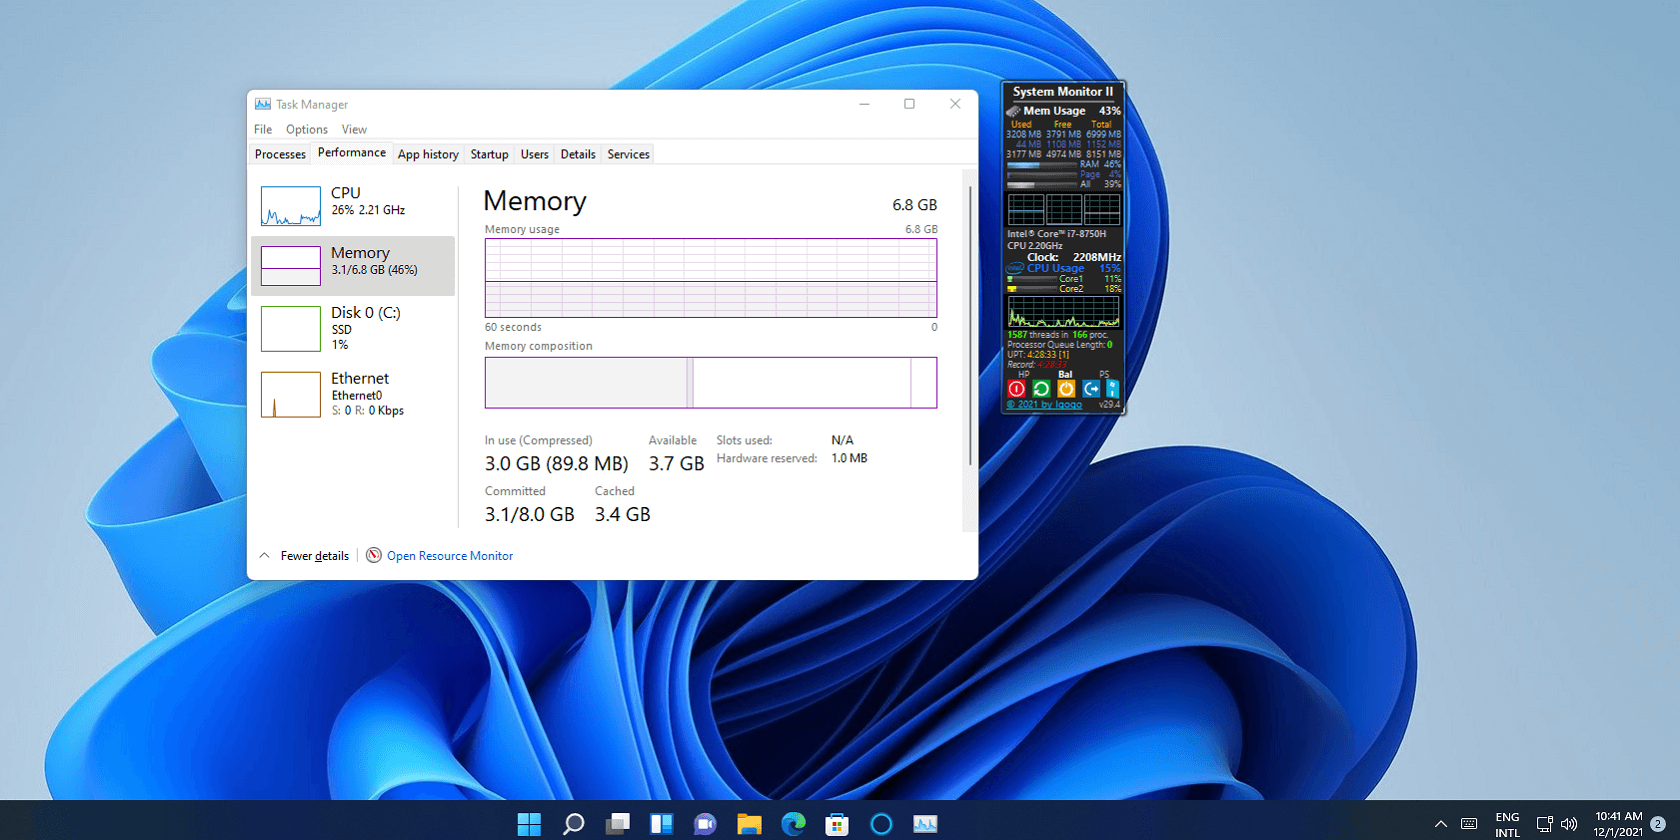
Solution 2. Use Task Manager
If you don’t want to restart your computer, you can also turn off background apps using your USB drive content from Task Manager.
Simply press the Ctrl + Shift + Escape key combo to open the Task Manager window. Next, click on the Processes Tab.
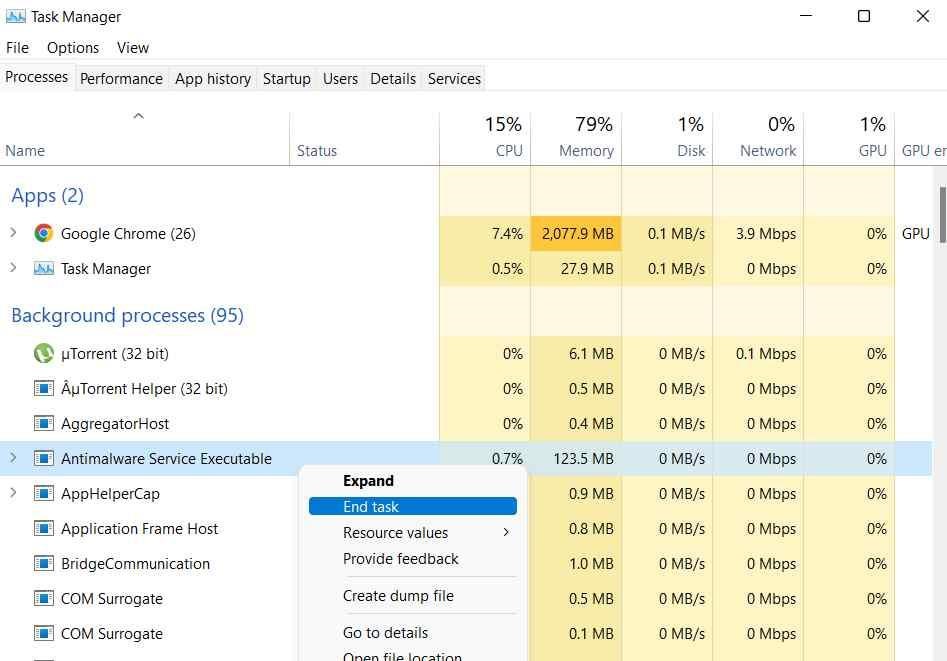
There you can look for the programs using the USB drive. After that, right-click on the program and select End Task. Restart your device and check if you are unable to eject a USB drive on Windows 11.
Solution 3. Use the Disk Management Utility
Windows provides various options to securely eject your USB drive. The Disk Management utility is another easy way to eject a USB drive. Here’s how you can do that:
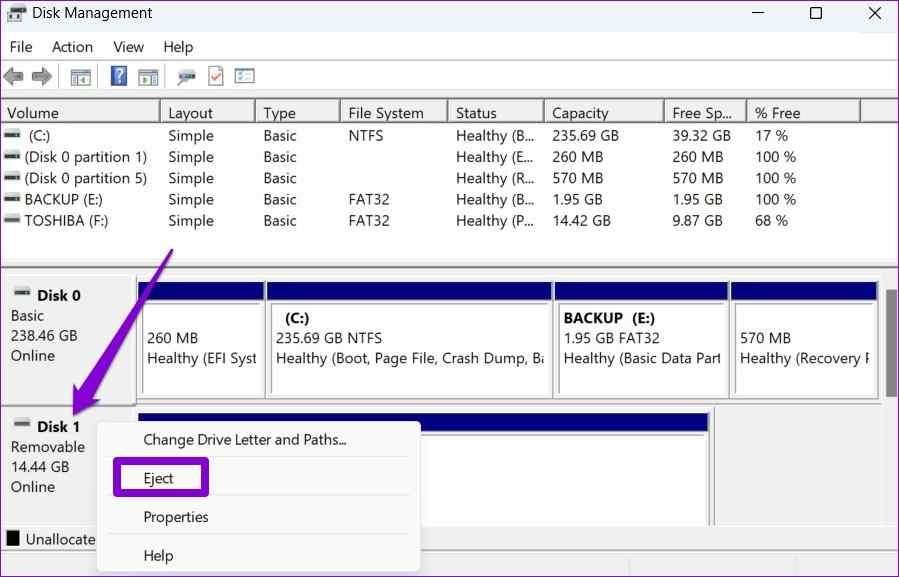
Step 1. Right-click on the Windows icon from the Taskbar and choose Disk Management.
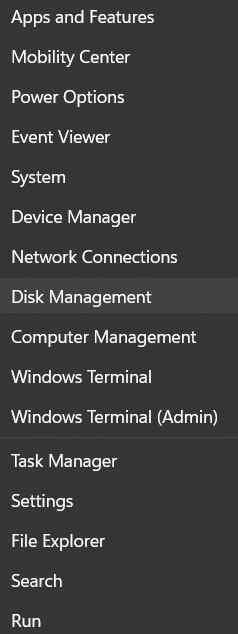
Step 2. On the Disk Management window, right-click on the USB drive you want to remove and select Eject. Then, restart your computer to fix the issue.
Solution 4. Use the Settings App
You can also use the default Settings app on Windows 11 to eject the USB drive. Follow these steps to safely eject your external hard drive from the Settings app:
Step 1. Click on the Windows icon and select Settings.
Step 2. Go to the Bluetooth and Devices category from the left pane.
Step 3. Click on the Devices.
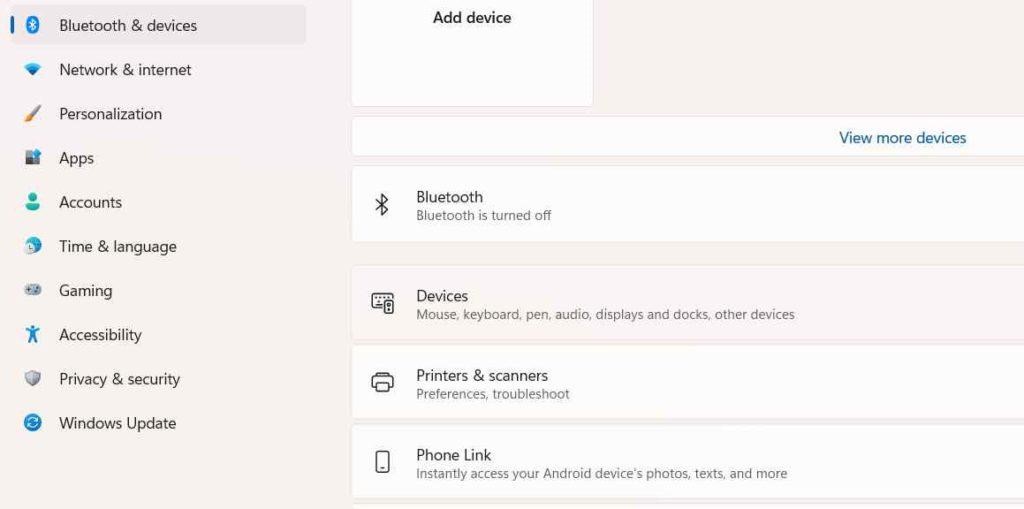
Step 4. Tap on the three-dot icon next to the USB drive and choose the Remove Device option. Press the Yes button to confirm your action.
Solution 5. Use the Safely Remove Hardware
Windows Safely Remove Hardware is the best option to eject the USB drive safely. Simply press the Windows and R keys to open the Run dialogue box.
Enter the following text in the search field:
RunDll32.exe shell32.dll,Control_RunDLL hotplug.dll
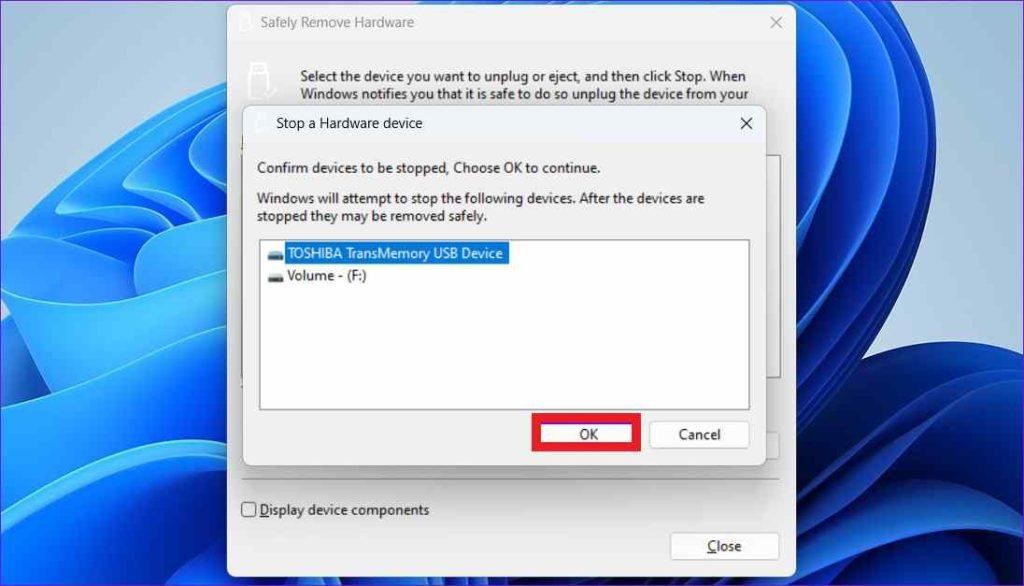
You can now see the Safely Remove Hardware window. Select the USB drive you want to close and hit the Stop button. Press the OK button to confirm.
Solution 6. Use the Device Manager
The Device Manager app is also easy to eject your external hard drive. Follow these steps when you are unable to eject the USB drive on Windows 11:
Step 1. Press the Windows and R key combo to open the Run dialogue box.
Step 2. Type devmgmt.msc in the text field and hit Enter.
Step 3. Once the Device Manager window opens, select Disk Drives.
Step 4. Right-click on the USB drive you want to eject and click on Properties.
Step 5. On the Properties window, move to the Policies tab.
Step 6. Select Better Performance and press the OK button. Reboot your computer before ejecting the USB drive.
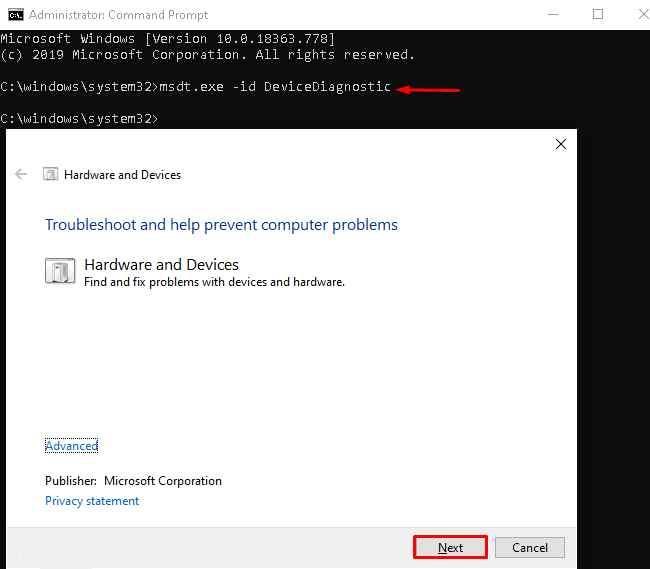
Solution 7. Hardware and Devices Troubleshooter
Windows troubleshooting helps you fix most hardware devices related issues with a click. Here’s how you can run the Hardware and Devices Troubleshooter on Windows 11:
Step 1. Click on the search field from Taskbar and type the command.
Step 2. Launch the Command Prompt program as an admin mode.
Step 3. On the Command Prompt window, enter the following command to run the Hardware and Devices Troubleshooter:
msdt.exe -id DeviceDiagnostic
Step 4. Press the Next button on the Hardware and Devices window to run the troubleshooter.
Step 5. Wait for a few minutes for a troubleshooter to detect and fix the potential problems. Once the process is completed, restart your computer before trying to remove your external device.
Solution 8. Update USB Drivers
Outdated or corrupted USB drivers on your computer can make it impossible to safely eject the USB drive. So, the best solution is to update your USB disk drivers as follows:
Step 1. Press the Windows and X key combination to open the Power User menu. Select Device Manager from the list.
Step 2. Double-click on the Universal Serial Bus Controllers to expand the menu. Check if there is a yellow exclamation mark next to any entry.
Step 3. Right-click next to the entry with a yellow exclamation mark and select Update driver.
Step 4. Now, follow the on-screen instructions to update your outdated USB drivers.
Solution 9. Scan the External Hard Drive for Malware Attack
People often make the mistake of connecting their USB drives to random devices. This can infect your USB data and conflict with the safe ejection on your device.
Thus, never attach your USB drive to unsafe PCs. Also, frequently scan your external hard drive for malware infections.
Here’s how you can scan your USB drives using Windows Defender:
Step 1. Go to This PC and right-click on the USB drive you want to scan for malware.
Step 2. Click on the Show More Options.
Step 3. From the popup menu, select the Scan with Microsoft Defender option. Wait for a few minutes to complete the entire external device check-up. If there is an infection, you can fix it to safely eject your USB.

Apart from Microsoft Defender, many other antivirus solutions for Windows are available, like McAfee, Norton, etc. You use a third-party tool to secure your computer and external hard drive.
Parting Note
There you have it, people! Finally, you know what to do when you are unable to eject a USB drive on Windows 11.
First, you should start restarting your computer or scanning for malware on the USB. If it doesn’t work, you can gradually try to update your USB drivers or run a troubleshooter.
However, you can comment if you get stuck somewhere, and our team will definitely help you. For more technical solutions, keep on following this website.
Author Bio:
Dinesh Lakhwani 
Dinesh Lakhwani, the entrepreneurial brain behind “TechCommuters,” achieved big things in the tech world. He started the company to make smart and user-friendly tech solutions. Thanks to his sharp thinking, focus on quality and the motto of never giving up, TechCommuters became a top player in the industry. His commitment to excellence has propelled the company to a leading position in the industry.
Popular Post


Recent Post

How To Adjust Display Appearance Settings Easily in Windows 11/10
Learn to adjust display appearance settings easily Windows offers. Simple guide covers brightness, scaling, resolution & multi-monitor setup for better screen experience.

Supercharge Your Productivity: A Solopreneur’s and SMB’s Guide to Mastering Google Workspace with Gemini’
Picture this. It’s Monday morning. You open your laptop. Email notifications flood your screen. Your to-do list has 47 items. Three clients need proposals by Friday. Your spreadsheet crashed yesterday. The presentation for tomorrow’s meeting is half-finished. Sound familiar? Most small business owners live this reality. They jump between apps. They lose files. They spend […]
9 Quick Tips: How To Optimize Computer Performance
Learn how to optimize computer performance with simple steps. Clean hard drives, remove unused programs, and boost speed. No technical skills needed. Start today!

How To Speed Up My Computer/Laptop Windows 11/10 [2025]
Want to make your computer faster? A slow computer can be really annoying. It takes up your time and makes work more difficult. But with a few easy steps, you can improve your laptop’s speed and make things run more smoothly. Your computer slows down over time. Old files pile up. Programs start with Windows. […]
How To Fix Low Disk Space Error Due To A Full Temp Folder
A low disk space error due to a full temp folder is a common problem. Many users face this issue daily. Your computer stores temporary files in special folders. These files ensure optimal program performance, but they can accumulate as time goes on. When temp folders get full, your system slows down. You might see […]
How to Use Disk Cleanup on This Computer: Step-by-Step Guide
Computers getting slow is just the worst, right? Well, yes! Files pile up on your hard drive. Luckily, the Disk Cleanup tool on your PC is here to save the day. It clears out unnecessary files, giving your system the boost it needs to run smoothly again. A lot of users aren’t aware of the […]

Top 25 Computer Maintenance Tips: Complete Guide [2025]
Computer maintenance tips are vital for every PC user. Without proper PC maintenance, your system will slow down. Files can get lost. Programs may crash often. These computer maintenance tips will help you avoid these problems. Good PC maintenance keeps your computer running fast. It makes your hardware last longer. Regular computer maintenance tips can […]
Reclaiming Disk Space On Windows Without Losing Files: A Complete Guide
Running low on storage can slow down programs and trigger that annoying “low disk space” warning. Files accumulate over time, cluttering the drive. The good news? It’s possible to reclaim space without deleting anything important. Reclaiming disk space on Windows without losing files is easier than you think. Your computer stores many temporary files, old […]

Fix Issues Downloading From the Microsoft Store on Windows 11, 10 PC
Do you get excited when you’re about to download a new app or game? You open the Microsoft Store, click the download button… but nothing happens. Or maybe it starts and then suddenly stops. Sometimes, strange messages pop up like “Something happened on our end” or “Try again later.” That can be really annoying. But […]
Fix Low Disk Space Errors Quickly On Windows 11, 10 PC [2025]
Low disk space errors can slow down your Windows PC. These errors appear when your hard drive runs out of room. Your computer needs space to work properly. When space runs low, programs crash and files won’t save. Windows shows warning messages about low disk space. Your PC may freeze or run slowly. You might […]